/image%2F0703241%2F20140120%2Fob_b8b3b5_blog-header-new2.jpg "nail art - reviews - swatches - nail tutorials")
Hello lovelies,
In this second part of Evixi Gel review I'll show you a nail art manicure I did for my short visit to Czech Republic and tell you more about the experience with this brand. If you've missed the first part with the review of Evixi Gel starter kit, check out the previous post.
Firstly, I'd like to just say that I just love the Shattered Glass trend (which you probably can tell from the previous posts I did) and I wanted to wear it again and test how well it works in gel polish. Let's have a look at the final look:

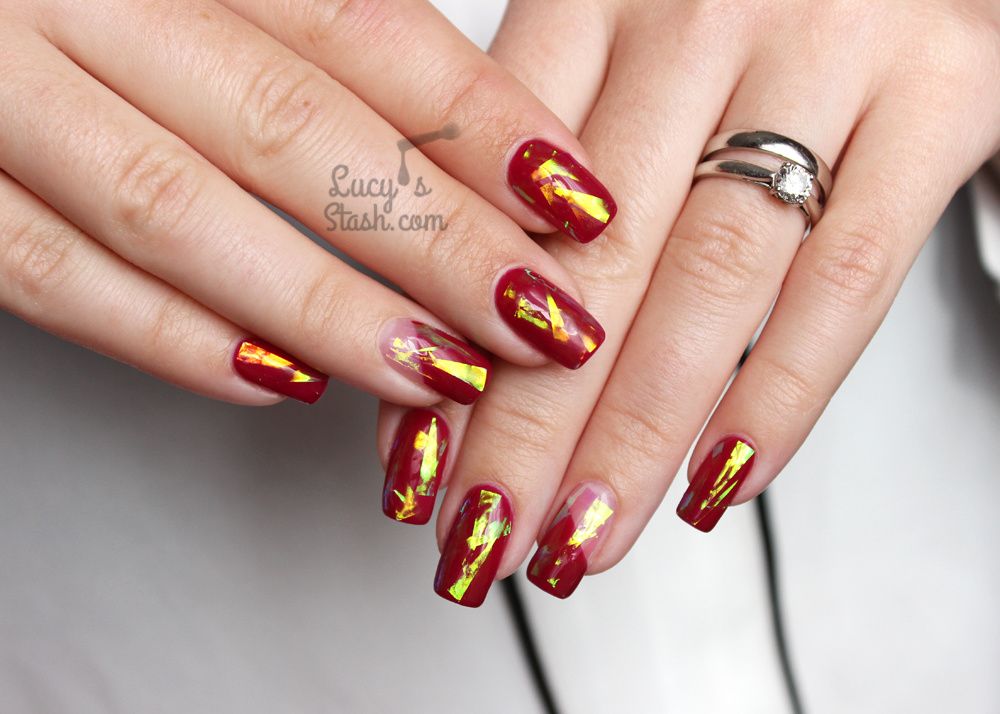

For this gel polish manicure I've used Evixi Gel in Garnet, a berry red creme colour. It's my favourite if all the colours I got to try and it worked well with all my outfits for the trip. As I said earlier, I've been testing the shattered glass look again because I was very curious if it will last longer with gel polish. Well, it does but it still isn't perfect. I spiced it up a bit with few accent nails with diagonal negative spaces near the cuticles :)
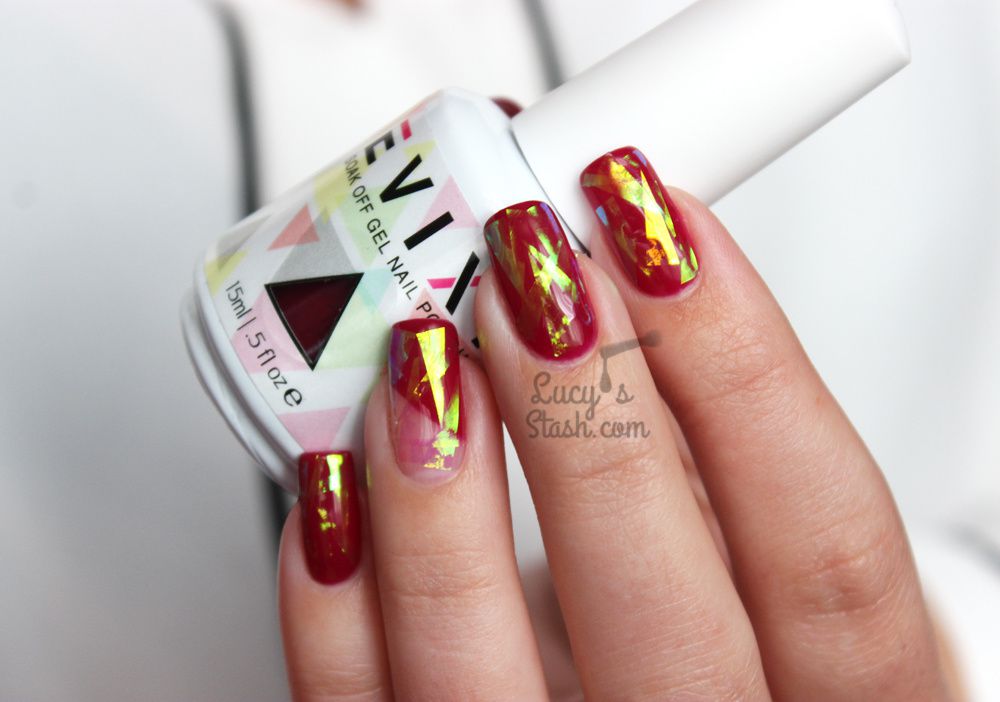
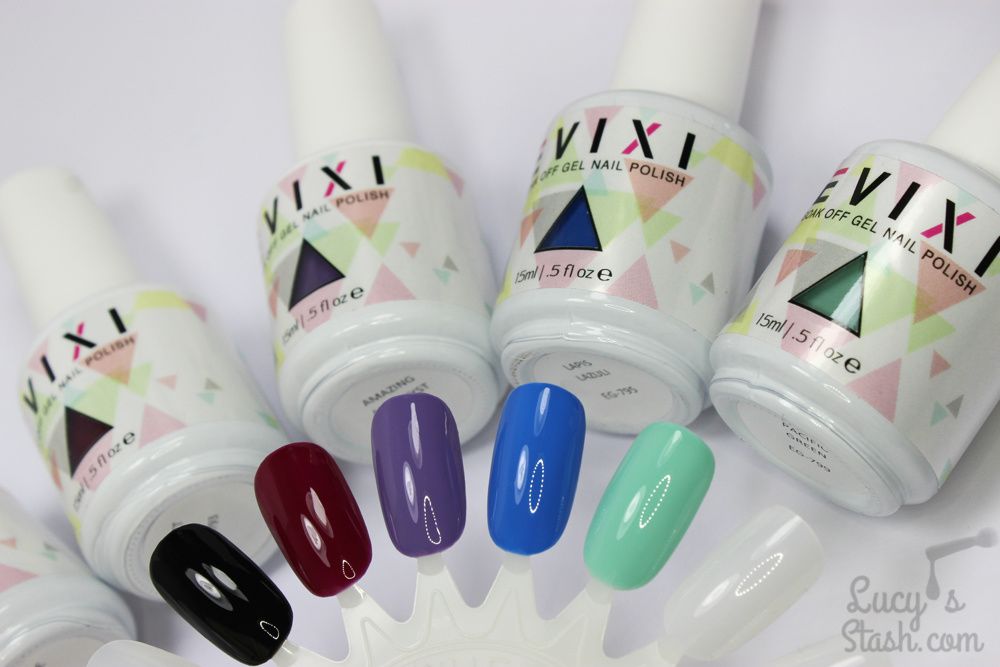
I'd like to say few words about the application and formula of Evixi Gel. The base and top gel are pretty much the same as with other gel polish brands so I'll take a closer look at the colour - Garnet. Unfortunately for me, I've picked the only colour that was pigmented less than the rest but I still made it work. But I had to adapt my application a little bit. In the previous post I've said that Garnet would probably need three thin coats as opposed to two for all the other colours. That's somewhat true but I pushed it a little bit and got away with two slightly thicker coats. The disadvantage of that was that in one place the gel polish pooled and once cured it crinkled. This just confirmed to me that these gel polishes (like all the other) need think coats. The Second coat masked the crinkly place so all was well in the end. Otherwise the application was easy and the final result looked beautiful.


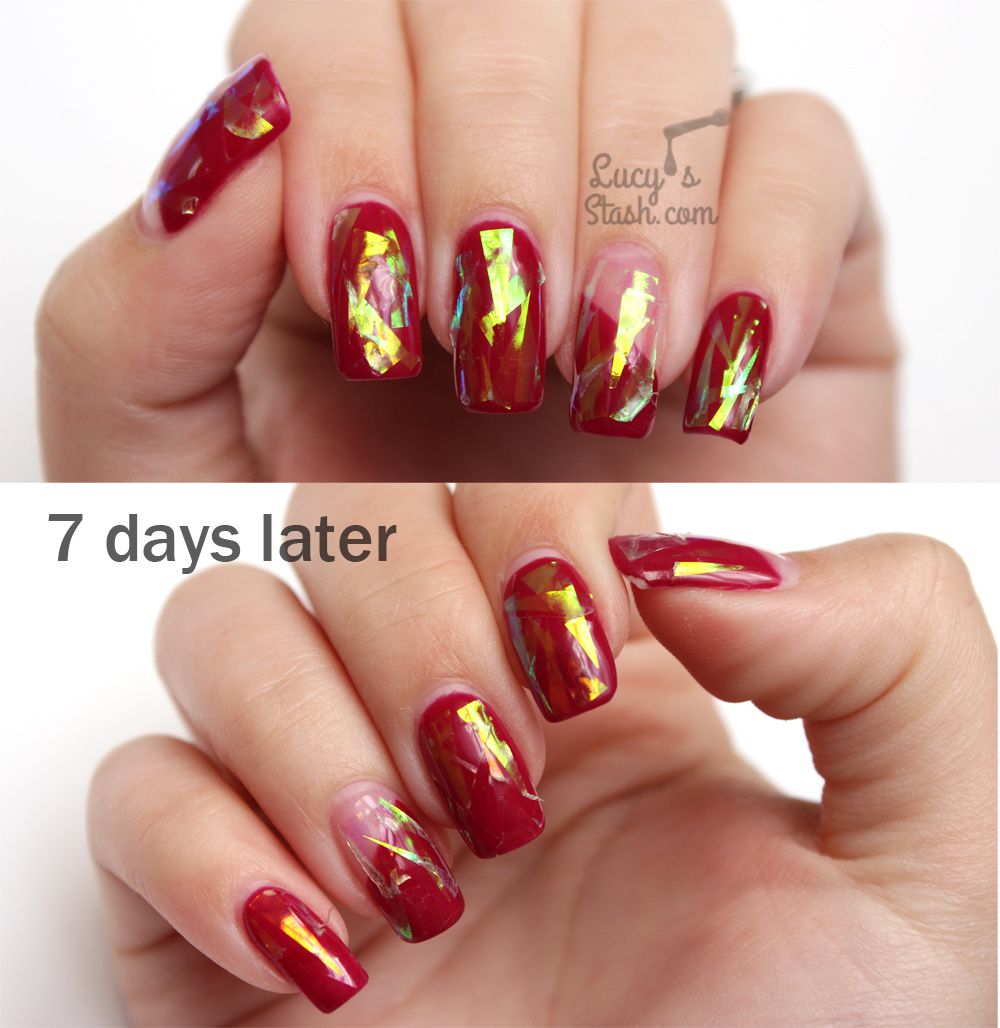
I've worn the manicure for total of 10 days and then I soaked it off. The cellophane pieces started to bother me after third or fourth day when little corners started to peel off and it was so hard to resist not peeling the whole thing off. The gel polish itself looked great after the 10 days apart from the growth and a little nick on the thumb (my fault for trying to open an eyeshadow with my nail) so I'm sure it would easily last whole two weeks. I took it off because the cellophane started to look awful and I peeled few pieces off by then. Here are photos of both of my hands after 7 days:
The biggest hurdle with the whole manicure was to make the pearlescent cellophane shards stick flat on my annoyingly curved nails. The ends kept sticking out so I had to use end of cuticle nippers to stick it down to the nail while curing it under lamp for it to stay flat. I was sticking the cellophane to the sticky layer after curing two coats of colour but it just wasn't always strong enough. I would definitely recommend embedding them under layer of gel for them to last nicely 2 weeks otherwise in nail and gel polish they won't last more than 5-7 days (in my experience).
Where to buy the cellophane/shattered glass? You can buy different shades in Born Pretty Store which ships worldwide. You can also use my code LUHH10 for $10 off your order. For UK customers I can also recommend www.lucysmylarandcrafts.co.uk
Here I've recorded the whole process of creating this manicure. It's not meant to be a tutorial but I thought it would be a shame to waste the footage. I've added some text direction to explain what to do but as I said, it wasn't intended like a proper tutorial. If you'd like to see a detailed gel polish application tutorial, check out my Gelish video.
The last thing you're probably wondering is about is removal. Even here Evixi Gel didn't disappoint. It removed just like any other gel polish, no extra work. I've used foil and piece of acetone saturated cotton pad and soaked my nails for about 15 minutes. Then I gently scraped off the softened gel with orange wood stick and if there was anything left I re-applied the pad and foil. In the end I didn't have damaged nails at all which made me quite happy. I think it's all about the right application and removal ;)
So there you have it - my experience with Evixi Gel products. It worked really well for me and I think the Full Starter Kit is an amazing value at current offer for £49.99. Other
*Evixi Gel products sent for review
/image%2F0703241%2F20201222%2Fob_7b3a98_semilac-my-love-gel-polish-nails-4.jpg) My Snowflake Nails for Christmas 2020 with Semilac...
My Snowflake Nails for Christmas 2020 with Semilac.../image%2F0703241%2F20200814%2Fob_22ce10_lart-supreme-kit-29-2.jpg) REVIEW: LART Supreme Mineral Powder Dipping System...
REVIEW: LART Supreme Mineral Powder Dipping System.../image%2F0703241%2F20170429%2Fob_799087_gilded-marbled-amethyst-nails-6.jpg) Dress your nails to impress with this marbled amethyst...
Dress your nails to impress with this marbled amethyst.../image%2F0703241%2F20170727%2Fob_3240b9_pink-gold-dry-brush-nail-art-4.jpg) The Manicure That (I) Rocked The Scratch Stars Awards...
The Manicure That (I) Rocked The Scratch Stars Awards...


/image%2F0703241%2F201307%2Fob_5db28a_capture-d-e-cran-2013-07-24-a-09-46-53.png) What's new in 'Lucy's Stash'? Product haul from October
What's new in 'Lucy's Stash'? Product haul from October