/image%2F0703241%2F20140120%2Fob_b8b3b5_blog-header-new2.jpg "nail art - reviews - swatches - nail tutorials")
Hello lovelies,
Today's post has two parts: in the first part I'll show you the Bundle Monster Festival box and stamping plates set and in the other half I'll do a nail art manicure with the set and it's also my Pastel Geometric manicure for a nail art challenge.
Bundle Monster has released their first themed collection called Festival which includes new stamping plates, California Dreaming Gel polish, festival water decals, natural stones, and holographic nail stickers!
Bundle Monster says: "Festival came together based on the trending movement of living young, wild and free! A little bit of 1970's Woodstock mixed in with our music culture of today. Everyone loves to go to a good festival where you can let your hair down and dance to the beat of your own drum. That's what our Festival collection is all about!"


As you can see, there are so many gorgeous new products in this collection! All of them seem to be sold separately so you can pick and choose which ones you want.
The first item is the California Dreaming Gel polish set. It consists of 6 creme gel polishes in summer shades. I will be doing review and some cool nail art with this collection later in a separate post.
Next, there is a set of water transfer decals with different sets of images ranging from palm trees and leaves, star signs and constellations to chevron stripes and more! These are thin and easy to use so I'll definitely be showing you some nail art manicures with them later as well.
Then there is a pot full of Natural Semi Precious Pebble Stones. These are different colours, shapes and sizes and I would probably use this with gels or gel polishes rather than with nail polish. I can see amethyst, coral, turquoise and other types of stones.
Another new release are Holographic Nail Art Stickers, I have the Cosmic Array set. These can be cut into any shape and adhered to the nail/nail polish and then sealed with top coat. They look very beautiful but I find them to be little bit thicker than I'd like. That's because my nails are very curved and stickers either crease or lift off at the edges.
But my absolute favourite from this box is the new set of Festival stamping plates! The images are so versatile and fun and there are several themes like geometric, hippie, festival, star constellations, hipster animals etc. Here are all the plates photographed for you:
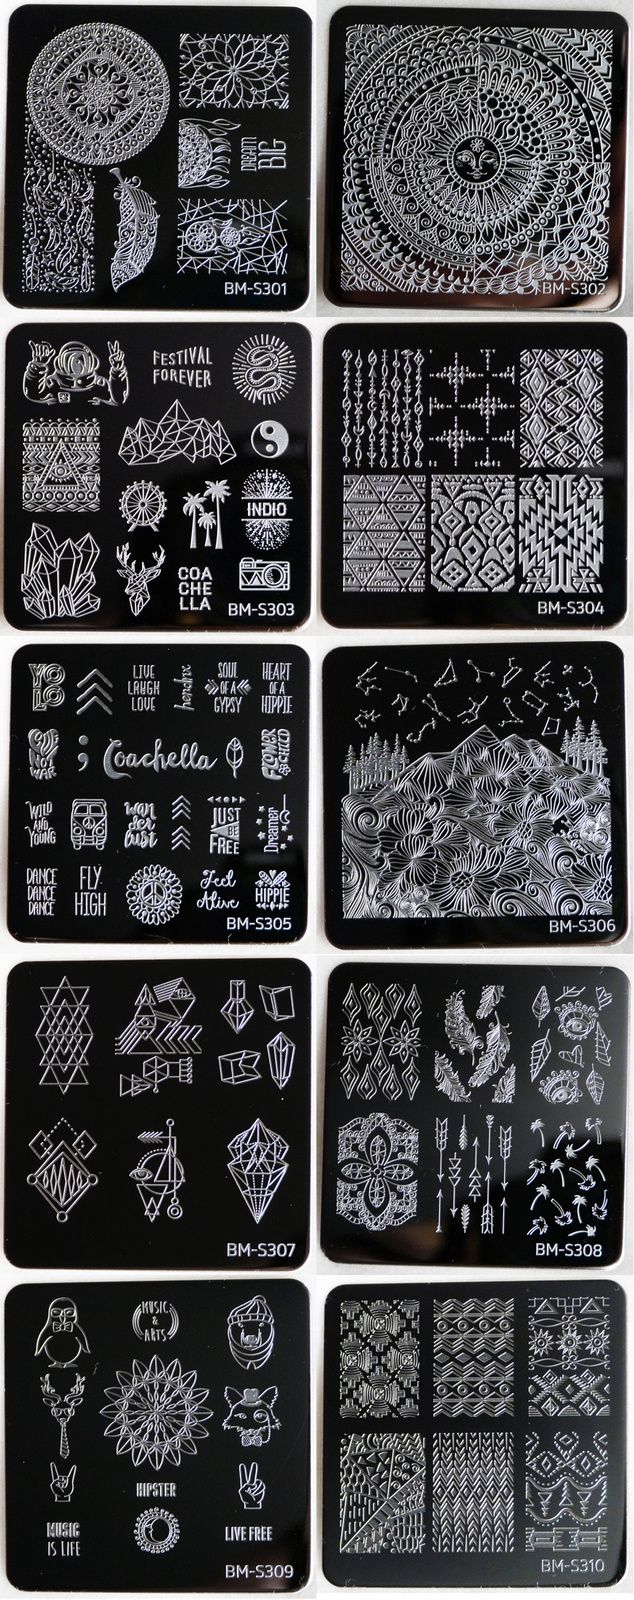
They are so beautiful - am I right or am I right? :D They all seem to be etched properly and I haven't spotted any mistakes. So far I have tested 4 out of the 10 plates and haven't had any problems with the images. I've also seen countless of awesome manicures with these plates from bloggers like Very Emily and Glitterfingersss and you should definitely check them out!
The plates come with the regular protective backing and blue foil (don't forget to remove it!). There is 10 of them in the set and they can be purchased for $14.99 or separately for $2.49 at Bundle Monster website or on Amazon.
And now, let's have a look at the second part of this post - the nail art challenge manicure. I am part of a group called Paint All The Nails and besides chatting about nails we also do a monthly nail art challenge. This month's theme is Pastel Geometric and I've decided to use the Bundle Monster Festival plates to create this manicure.

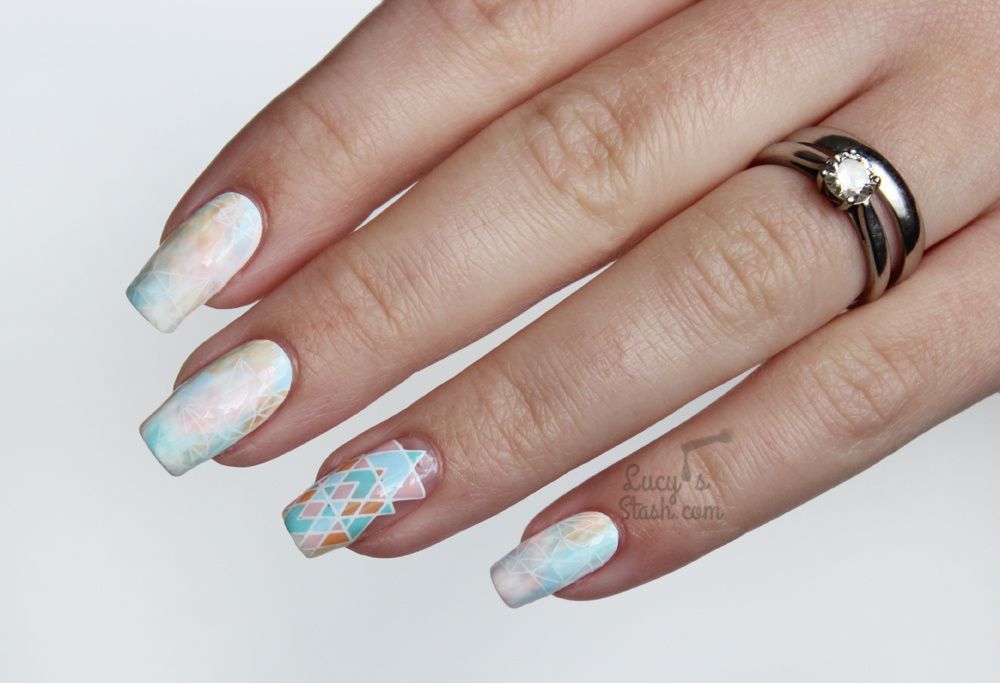
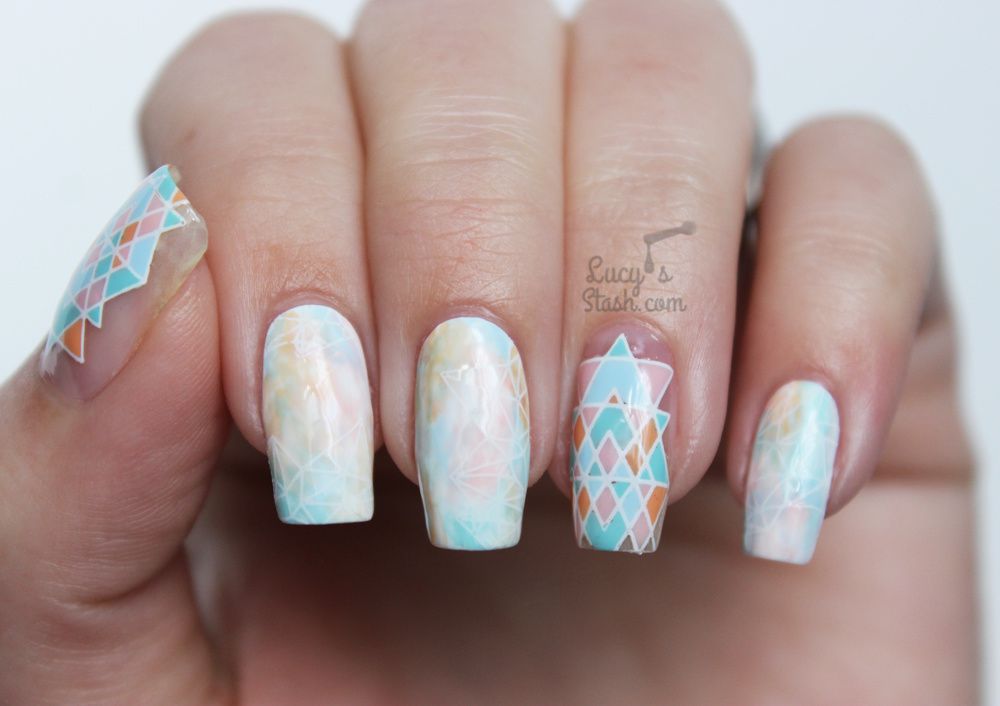
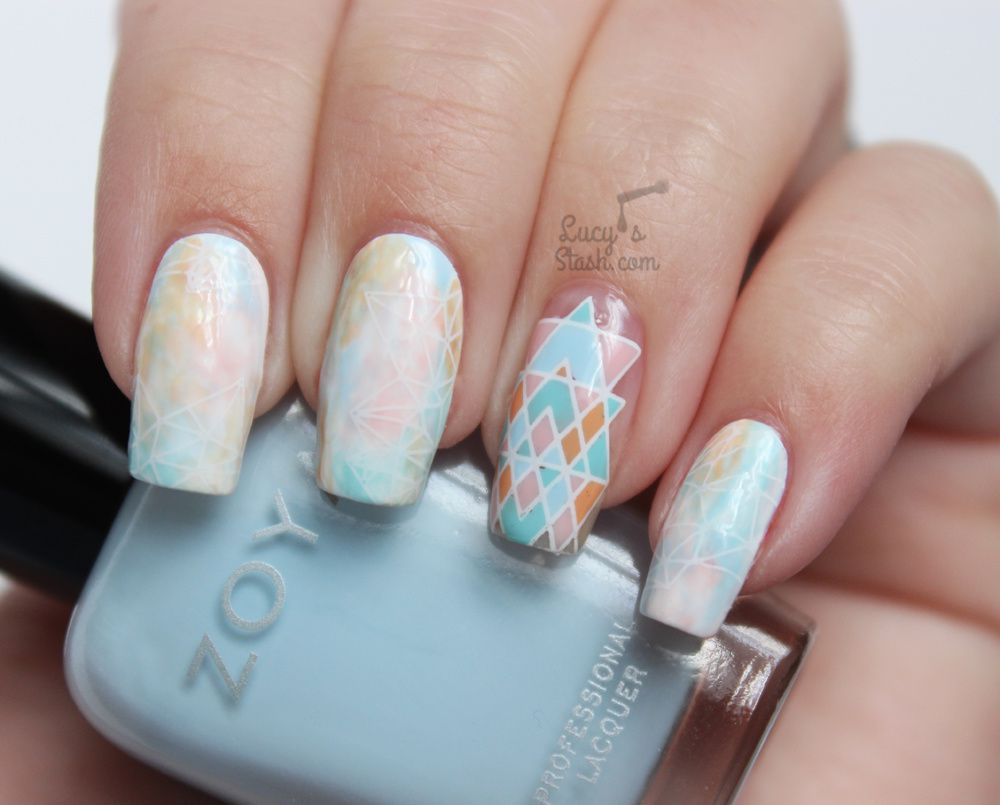
For this look I have used two techniques - stamping decals and kind of an acetone wash with stamping. First I've created stamping decals with a geometric design from BM-S307 plate and applied them to naked nail, creating a negative space around the decal. I've used Zoya Cole, Dot, Lillian and Blu, all light and pastel colours.
I've painted the remaining nails with one coat of white nail polish (Color Club French Tip). Then I've mixed little bit of nail polish in one of the four pastel colours with acetone and painted the mixture over the white polish. This helped me get a watercolour look and overlap the pastel shades. Finally, I've stamped over the watercolour look with white geometric stamping from Bundle Monster BM-S303 plate.
I really like the soft look of the watercolour nails and the contrasting boldness of the geometric stamping decals. I think that despite decals being a lot of work they are totally worth it :)
/image%2F0703241%2F20201222%2Fob_7b3a98_semilac-my-love-gel-polish-nails-4.jpg) My Snowflake Nails for Christmas 2020 with Semilac...
My Snowflake Nails for Christmas 2020 with Semilac.../image%2F0703241%2F20200814%2Fob_22ce10_lart-supreme-kit-29-2.jpg) REVIEW: LART Supreme Mineral Powder Dipping System...
REVIEW: LART Supreme Mineral Powder Dipping System.../image%2F0703241%2F20170429%2Fob_799087_gilded-marbled-amethyst-nails-6.jpg) Dress your nails to impress with this marbled amethyst...
Dress your nails to impress with this marbled amethyst.../image%2F0703241%2F20170727%2Fob_3240b9_pink-gold-dry-brush-nail-art-4.jpg) The Manicure That (I) Rocked The Scratch Stars Awards...
The Manicure That (I) Rocked The Scratch Stars Awards...

