/image%2F0703241%2F20140120%2Fob_b8b3b5_blog-header-new2.jpg "nail art - reviews - swatches - nail tutorials")
Hey girls!
How are you all? I can't believe how fast the Summer is flying past..not that it's much of a Summer here in England. So I'm left to cheer myself up with pretty colours on my nails ;)
The manicure I'm going to show you in the post was inspired by Maria over at So Nailicious so if you don't already know her fabulous blog, you simply must check it out!
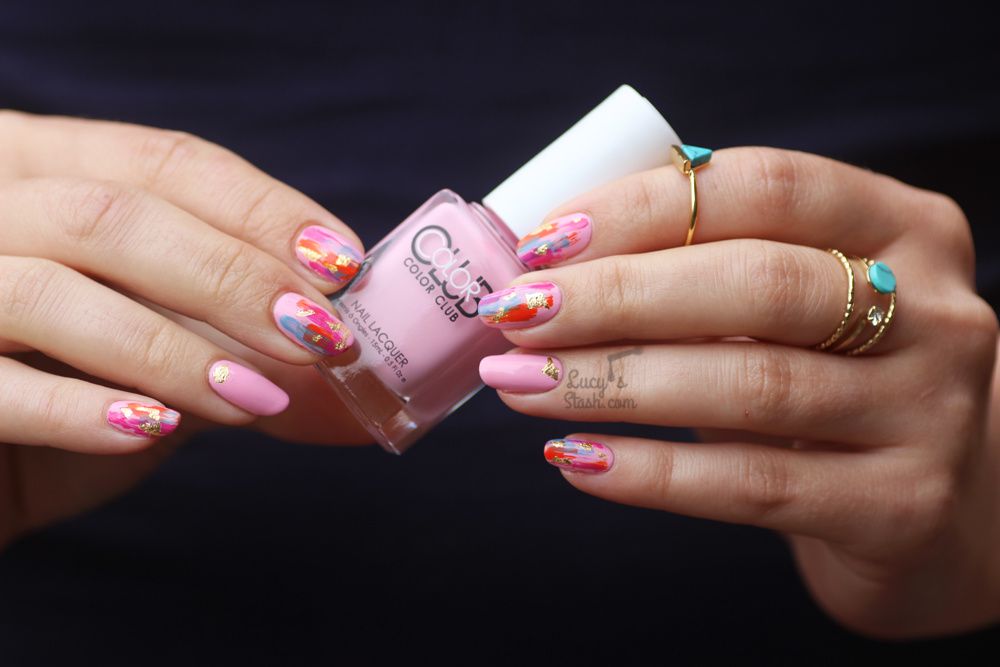
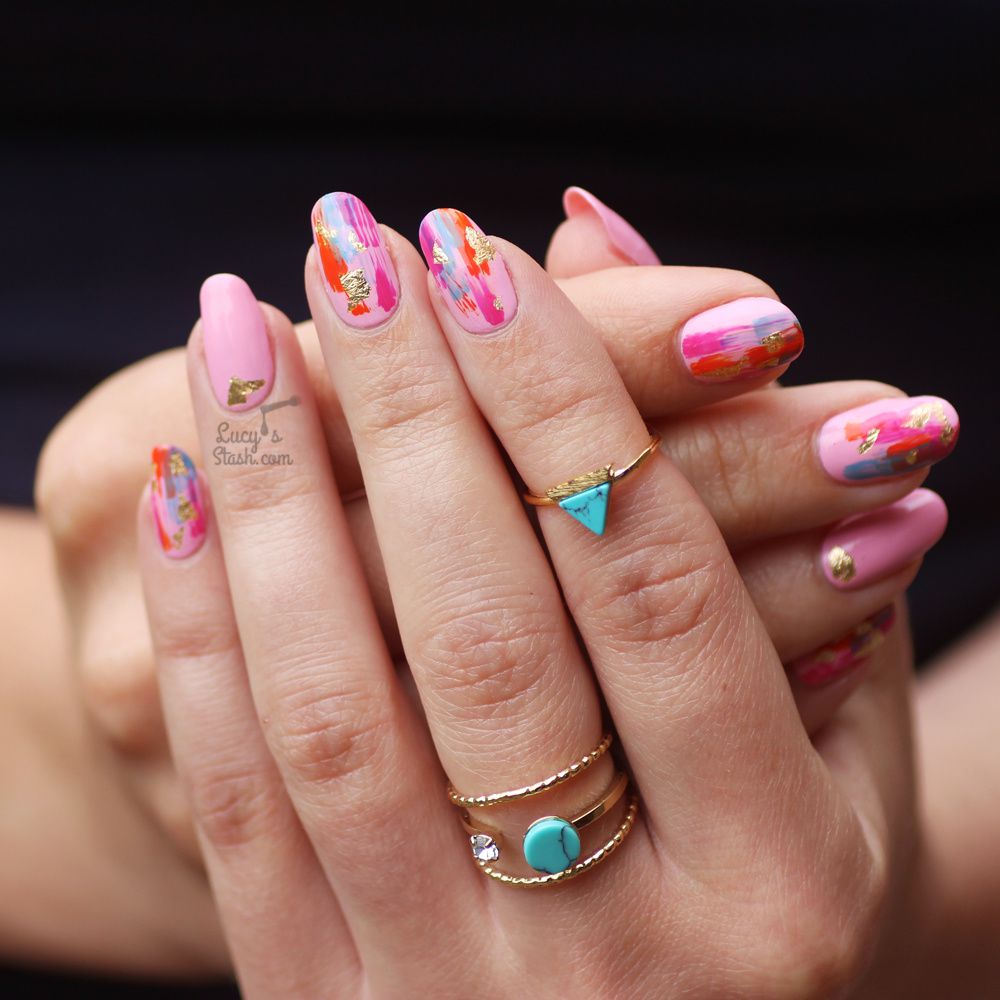
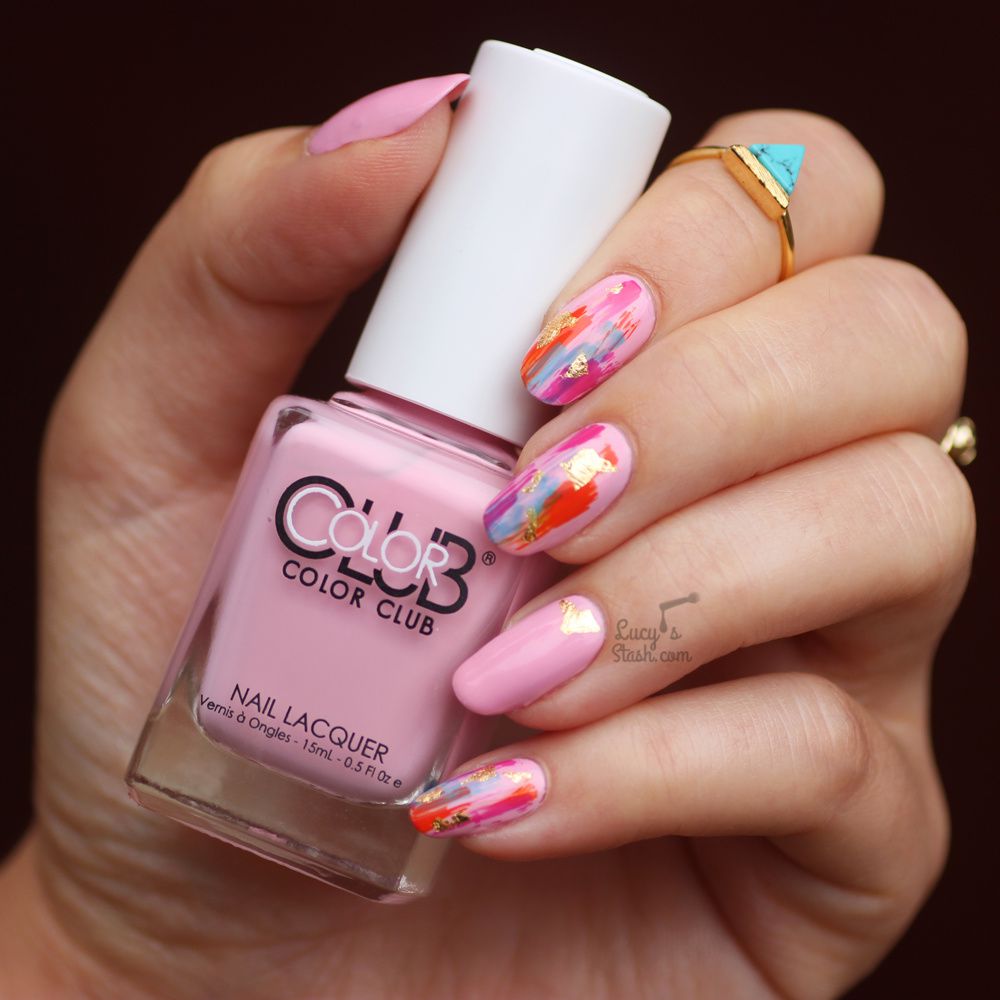
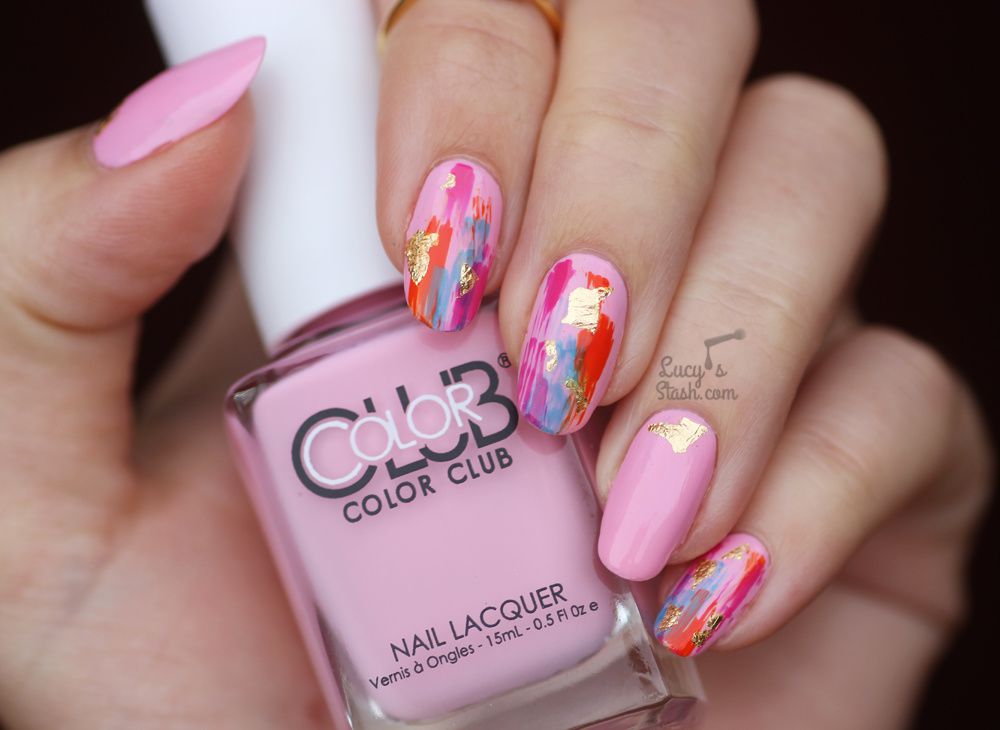
I wore this this easy-to-create dry brush & gold leaf nail art for this year's Scratch Stars Awards held in Tropicana Beach Club in London. I've written a whole post about the evening and who won the Best UK Nail Blogger, read the post here.
Let's check out the nails...
As I've said, this manicure was very easy to do, Maria actually created a video tutorial, watch it here.
For my version I've used two coats of Color Club Je T'aime, a lovely creme candy floss pink. Then I've used the dry brush technique and added blue, fuchsia and orange brushstrokes. The polishes I've used were:
- OPI Can't Find My Czechbook (I looove this one for its name!) - turquoise blue creme
- OPI Kiss Me On My Tulips - medium fuchsia creme
- OPI A Roll In The Hague - reddish orange creme
Once I was happy with the brushstrokes, I've added gold leaf pieces. Sometimes the polish underneath was still tacky so the gold leaf would stick just fine but if it wasn't sticking I just lightly brushed a bit of base coat where i wanted the gold leaf to go. Lastly, I've finished off with couple of coats of Morgan Taylor REACT Top Coat. I've also used the Morgan Taylor REACT Base Coat for longer lasting wear and as always, my manicure lasted about 10 days with this superb duo! If you haven't tried it yet, it worked great for me!

Some of you might also be wondering where i got those cute gold & turquoise stone rings. I bought them at Luna Pyxis and this is my favourite site for beautiful and affordable rings.
What did you think of this manicure? Have you tried the dry brush technique yet? If not, I've previously created a video tutorial for this technique, give it a try, it's super easy!
Have a lovely weekend!
Lucie x
/image%2F0703241%2F20201222%2Fob_7b3a98_semilac-my-love-gel-polish-nails-4.jpg) My Snowflake Nails for Christmas 2020 with Semilac...
My Snowflake Nails for Christmas 2020 with Semilac.../image%2F0703241%2F20200814%2Fob_22ce10_lart-supreme-kit-29-2.jpg) REVIEW: LART Supreme Mineral Powder Dipping System...
REVIEW: LART Supreme Mineral Powder Dipping System.../image%2F0703241%2F20170429%2Fob_799087_gilded-marbled-amethyst-nails-6.jpg) Dress your nails to impress with this marbled amethyst...
Dress your nails to impress with this marbled amethyst.../image%2F0703241%2F20170725%2Fob_0d88fc_20399307-10154800093170920-736541443-o.jpg) Scratch Stars Awards 2017 At Tropicana Beach Club London!
Scratch Stars Awards 2017 At Tropicana Beach Club London!


/image%2F0703241%2F20170727%2Fob_3240b9_pink-gold-dry-brush-nail-art-4.jpg) The Manicure That (I) Rocked The Scratch Stars Awards...
The Manicure That (I) Rocked The Scratch Stars Awards...