/image%2F0703241%2F20140120%2Fob_b8b3b5_blog-header-new2.jpg "nail art - reviews - swatches - nail tutorials")
*PR samples
Hello lovelies,
Have you seen the new Models Own HyperGel Polishes yet? They are perfect for Autumn and Winter season and all have slightly jelly-ish formula!
Following the success of Models Own HyperGel, their first gel effect colour collection - MO are now releasing new in-demand autumnal updates. Five brand new shades that are super glossy with a gel effect, delivering extra rich colour. The new mega-shine shades are highly pigmented, long-lasting and chip resistant. The gel-like finish gives the professional shine of a salon manicure, is enriched with lotus flower oil and is easily removed with nail polish remover.

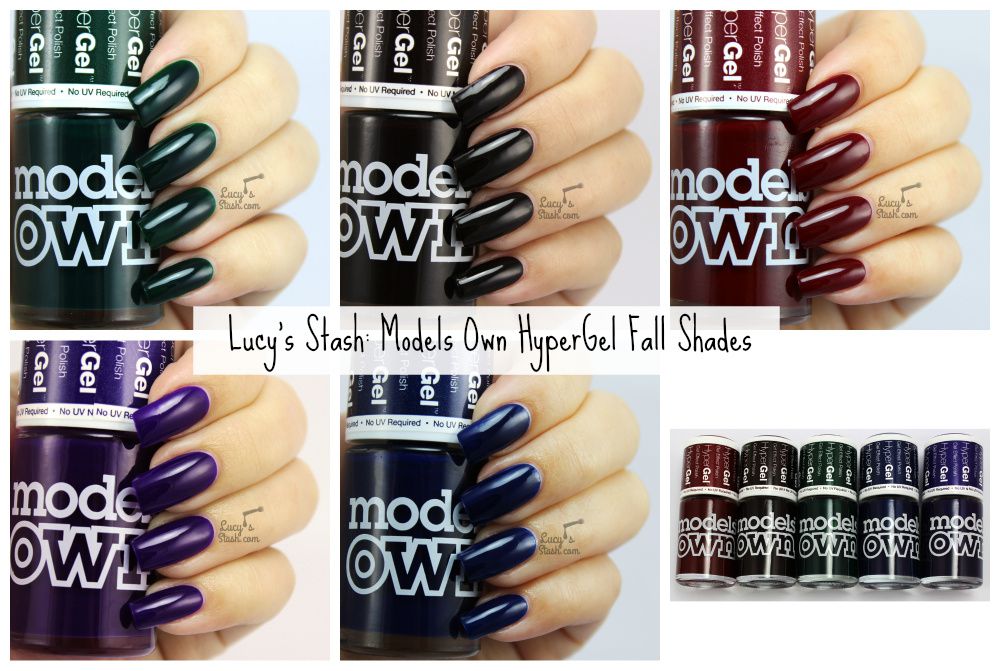
Ebony Green - dark forest green shade. I had to try this shade first because there's just something about green jellies that fascinates me. Ebony Green doesn't have completely jelly formula but there certainly is a hint of it and it makes the polish looks squishy and glossy. I've applied two regular to thicker coats and they applied very nicely. No patching, no streaks and no topcoat! This polish can be a bit lighter in places if you apply thin coats so you might need three coats in some cases.


Brunette Red - Brunette Red very much says it all - this is not just plain classic red, it has brown undertones and squishy finish. I'm wearing two coats and no topcoat again. The finish is smooth and glossy and it was very easy to apply.


Raven Red - dark brown shade. This is clearly a dark brown so the name Raven Red confuses me a bit. The brown is very dark, almost blackened but you can still tell it's not black. It applied nicely and two coats were fully opaque. It also dried quite fast and glossy. No topcoat.


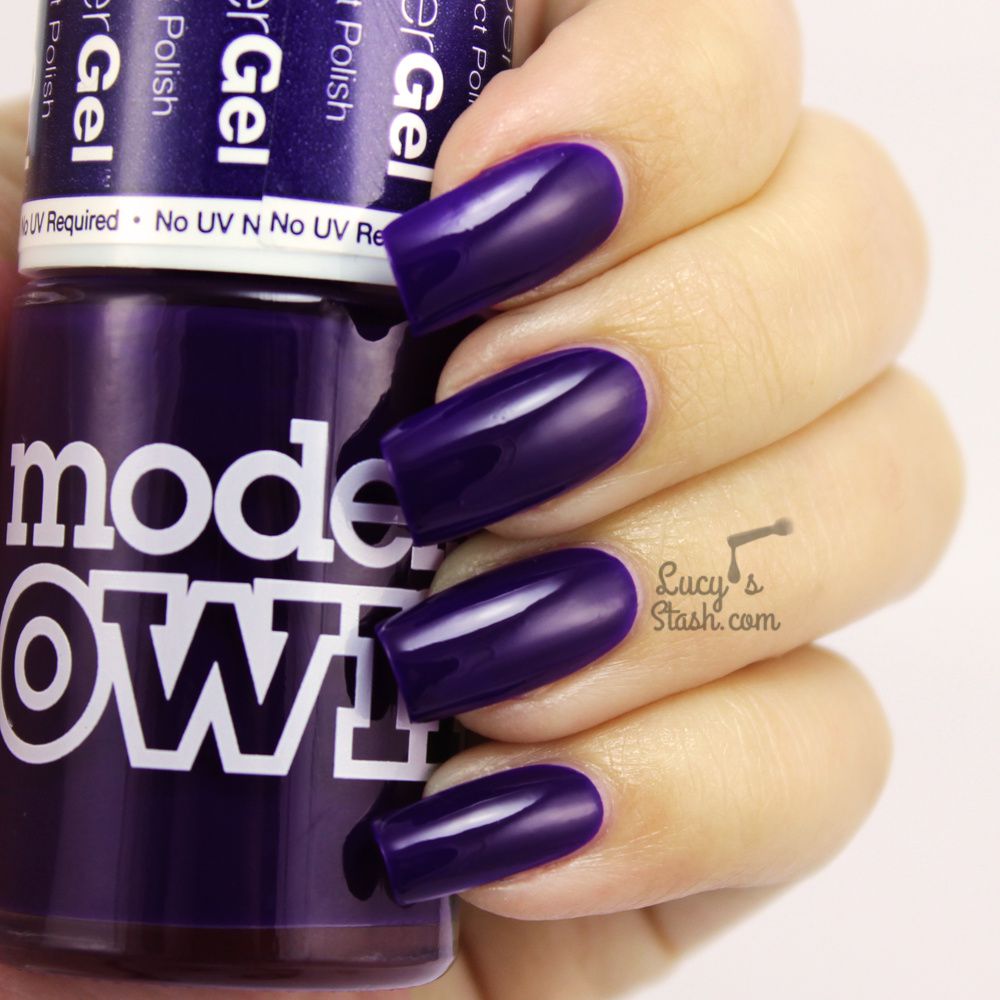
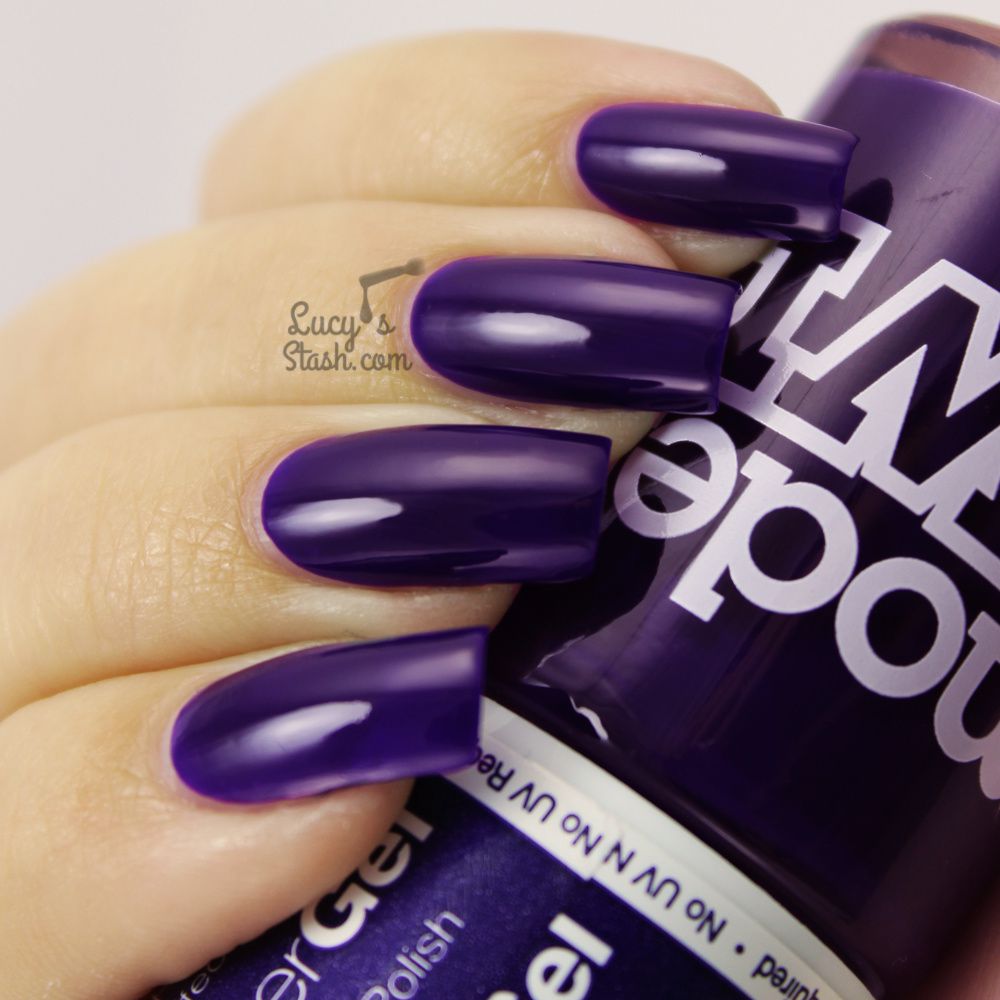
Pitch Purple - dark ink purple shade. Ooooh, this one is gorgeous! It's a mix between ink blue and grape purple, it's very rich and pretty. I'm wearing two coats again with no topcoat. Application was easy and it dried fast.
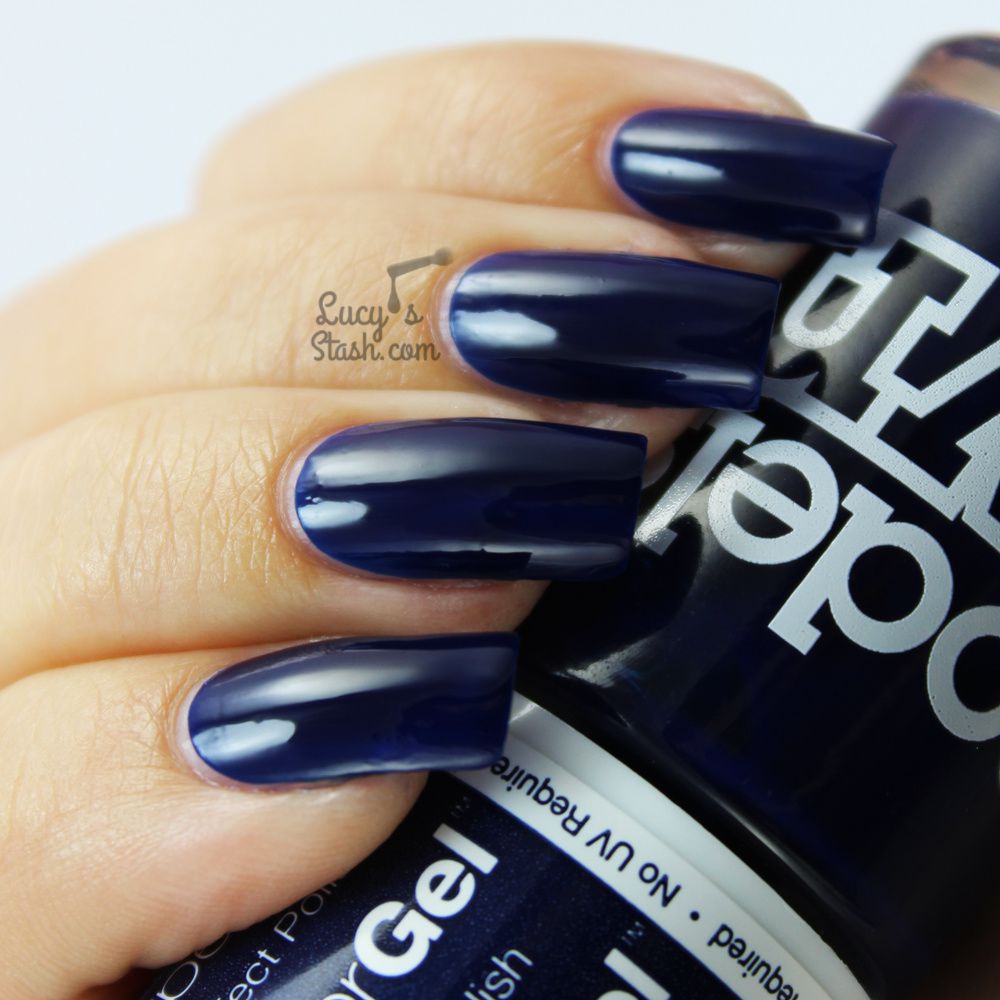
Inky Blue - dark blue shade. Beautiful ink/sailor blue that will be so awesome for winter! Inky Blue is not exactly unique shade but I love the glossy and smooth finish and it also has that jelly-ish look. It's fully opaque in two coats and application was easy. I am not wearing topcoat.

I really like the autumn additions to the HyperGel Line. Some of them could be a bit lighter but some of them are perfect. My absolute favourites are Ebony Green and Pitch Purple. They all had pretty much the same formula hat applied easily, was opaque in two coats and had that jelly-ish squishiness to it. All were very glossy even without topcoat but do apply topcoat if you want to wear them for more than a day.
I have purchased some of the original HyperGel polishes but I didn't like them as much as these new releases. I've shown some original colours in this post.
You could get these new HyperGel shades at Models Own website and at Models Own Bottle shops since 31st October.
Have a nice weekend and stay polished! Lucie x
/image%2F0703241%2F20161115%2Fob_4cb34a_models-own-glitterball-collection-11.jpg) Models Own Glitterball Collection & Instagram GIVEAWAY...
Models Own Glitterball Collection & Instagram GIVEAWAY.../image%2F0703241%2F20160828%2Fob_2a36ab_pink-and-bare-minimalist-nail-art-4.jpg) Abstract Nail Art with Models Own Dare to Bare Collection
Abstract Nail Art with Models Own Dare to Bare Collection/image%2F0703241%2F20160726%2Fob_bb99fb_pastel-neon-watermarble-with-mo-soft-p.jpg) ABC Challenge: M is for Marbled Nail Art | Nail Art...
ABC Challenge: M is for Marbled Nail Art | Nail Art.../image%2F0703241%2F20160726%2Fob_5f7bea_neon-yolo-gradient-and-stamping-2.jpg) Paint All The Nails Presents Neon Nail Art
Paint All The Nails Presents Neon Nail Art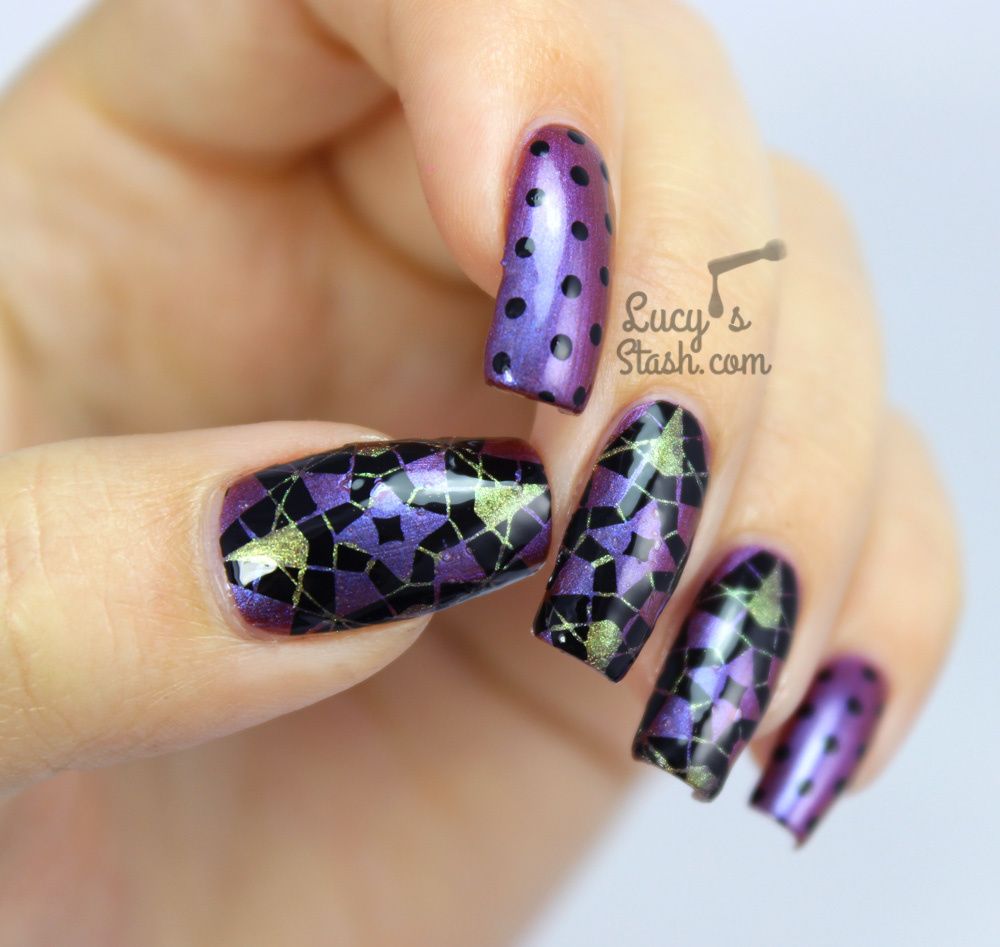


/image%2F0703241%2F20141109%2Fob_c6033c_cartoon-blocks-nails-with-spell-polish.jpg) Cartoon Colour Block Nails with Spell Polish
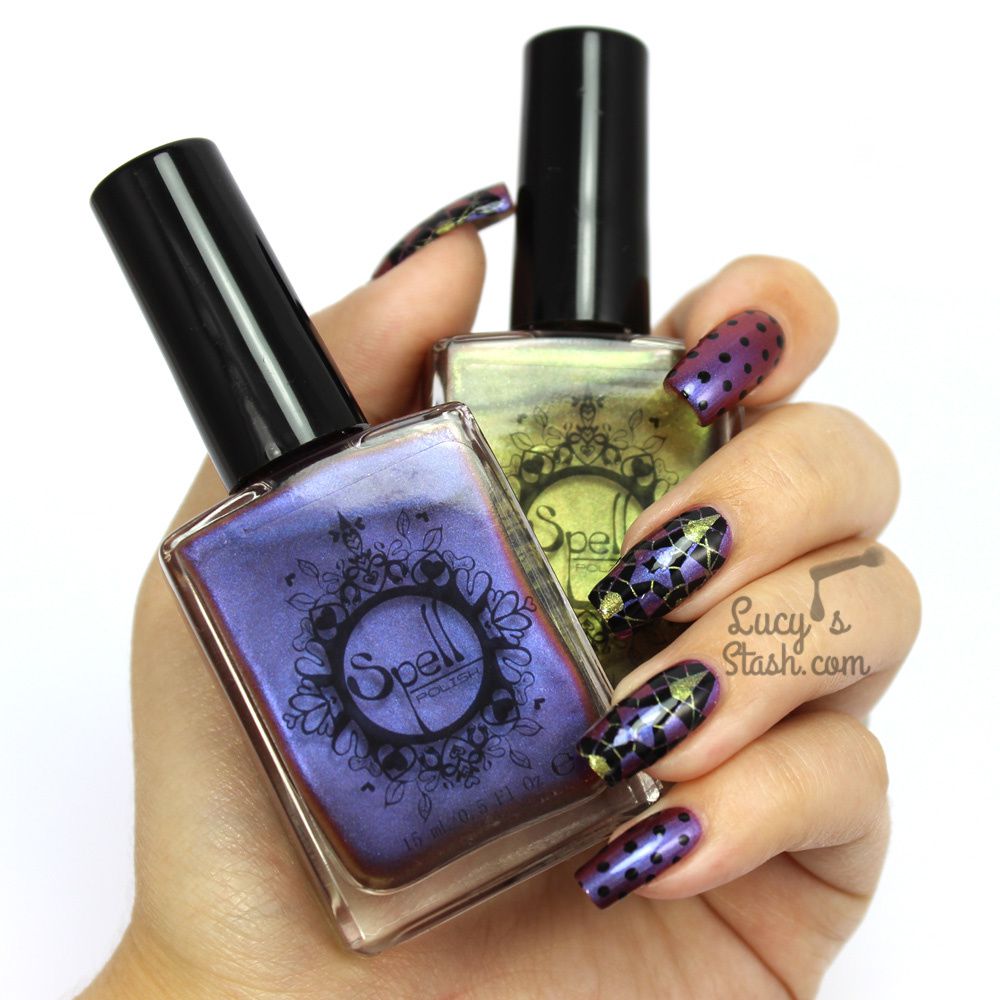
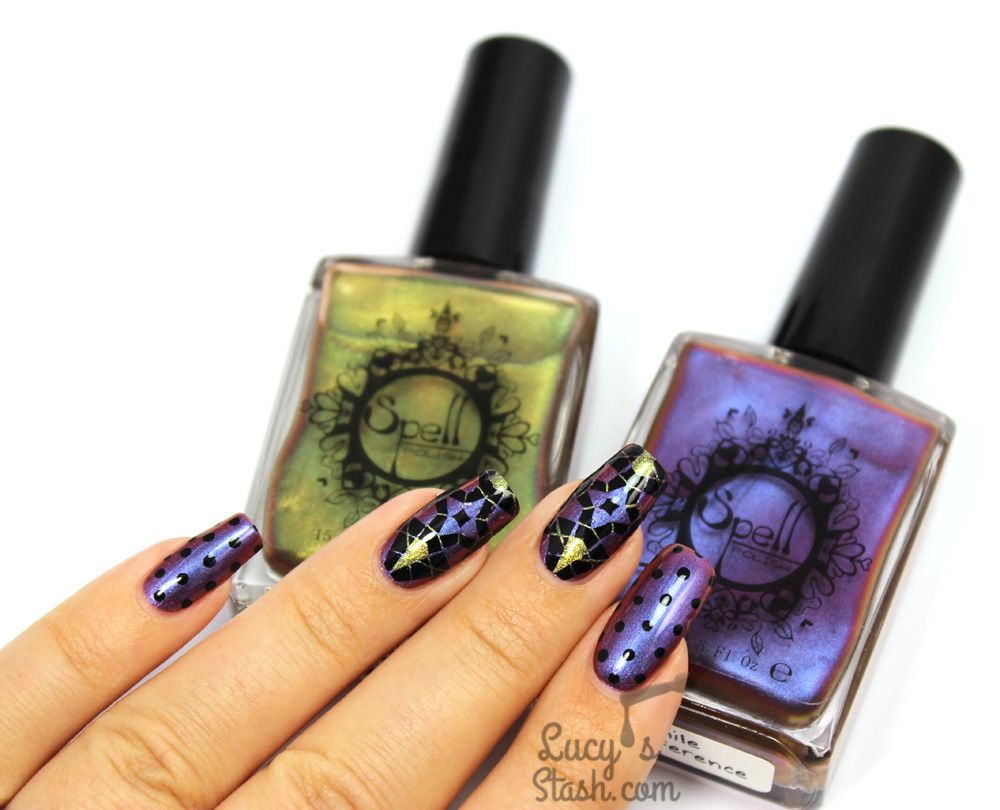
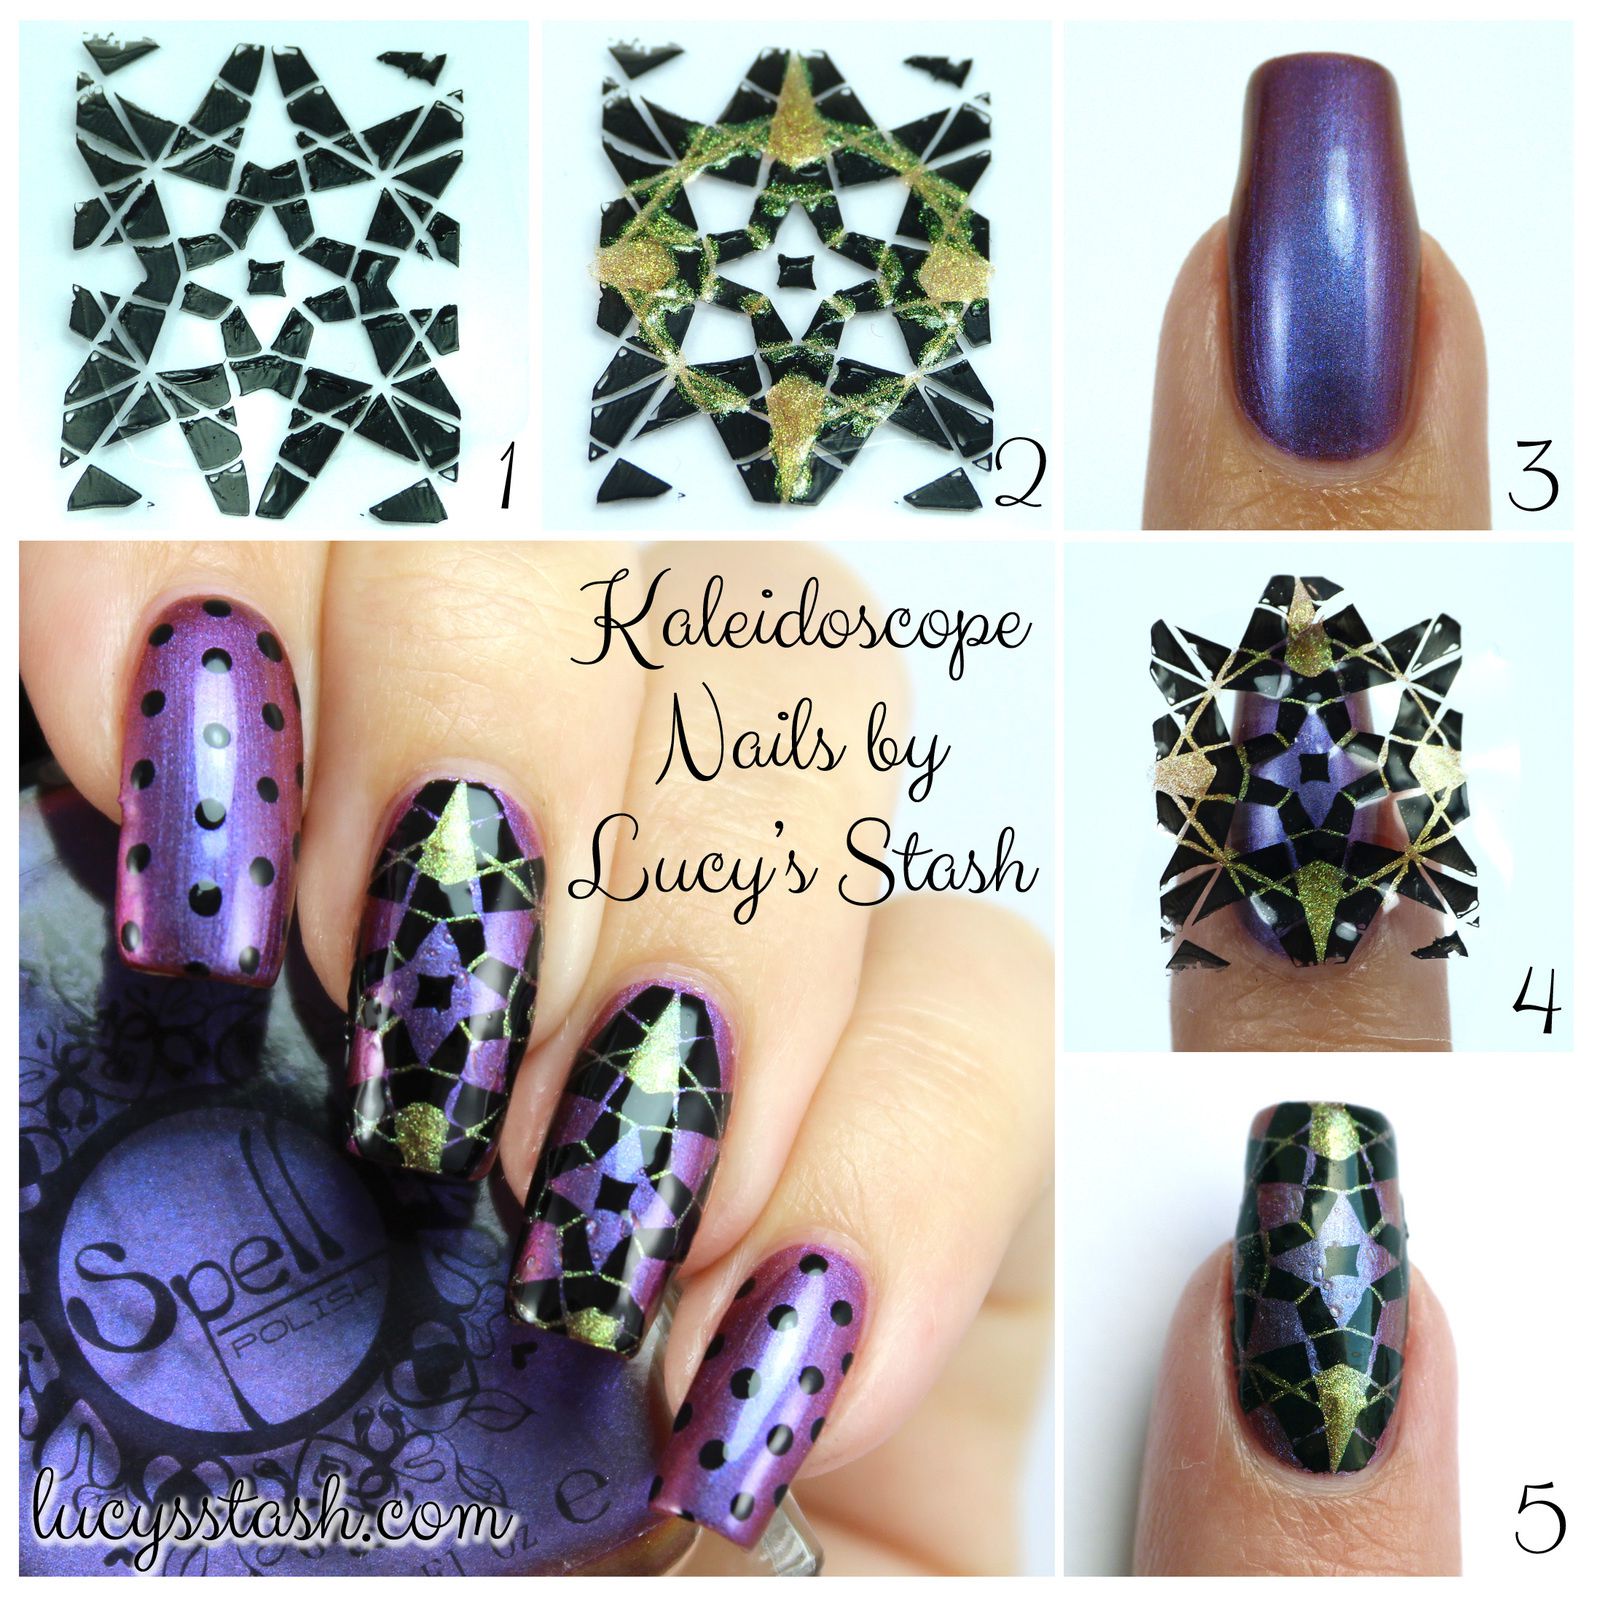
Cartoon Colour Block Nails with Spell Polish/image%2F0703241%2F20141015%2Fob_2e0a8e_spell-polish-smile-transference-5.jpg) Spell Polish - Smile Transference | Review & Swatches
Spell Polish - Smile Transference | Review & Swatches