/image%2F0703241%2F20140120%2Fob_b8b3b5_blog-header-new2.jpg "nail art - reviews - swatches - nail tutorials")
*PR samples
Hello lovelies,
I'm sorry for the delay in posting this second part life has been crazy and without sunny days to show off the holo effect in some of the shades. If you've missed the I Love Nail Polish Summer Collection 2014 part 1 showcasing the holographic polishes, click here to check it out.
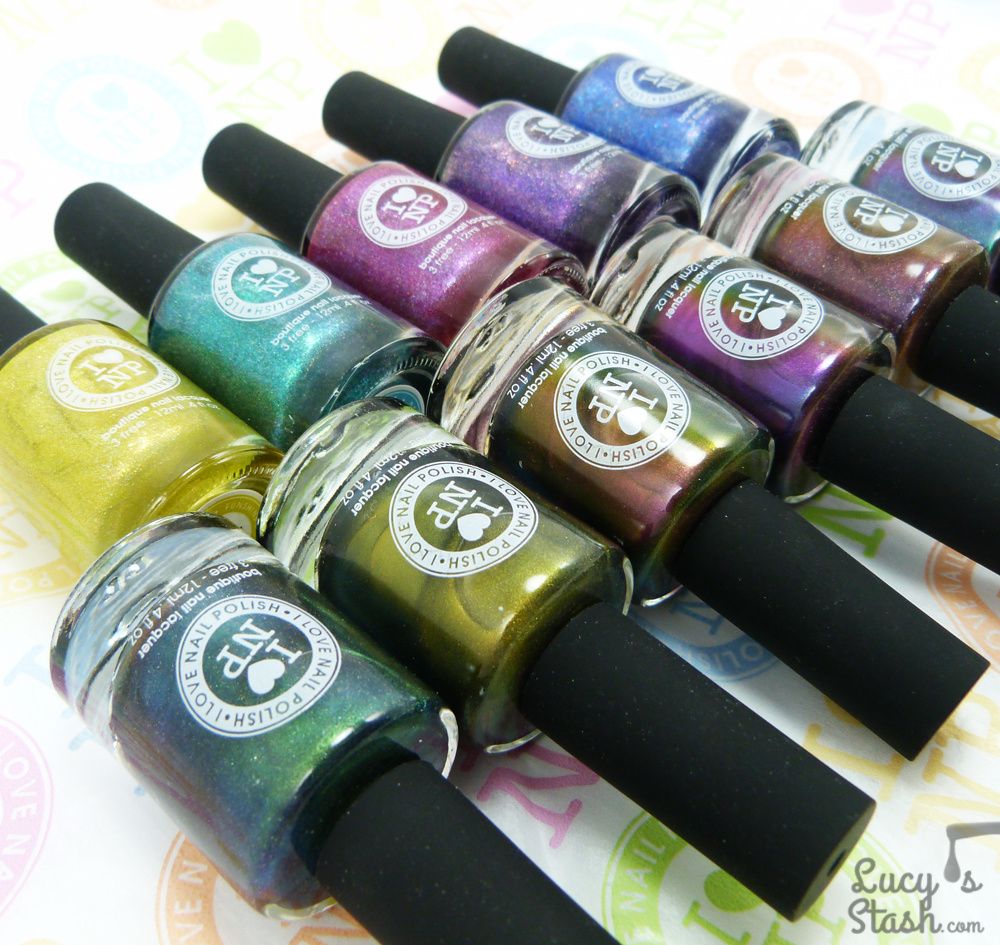
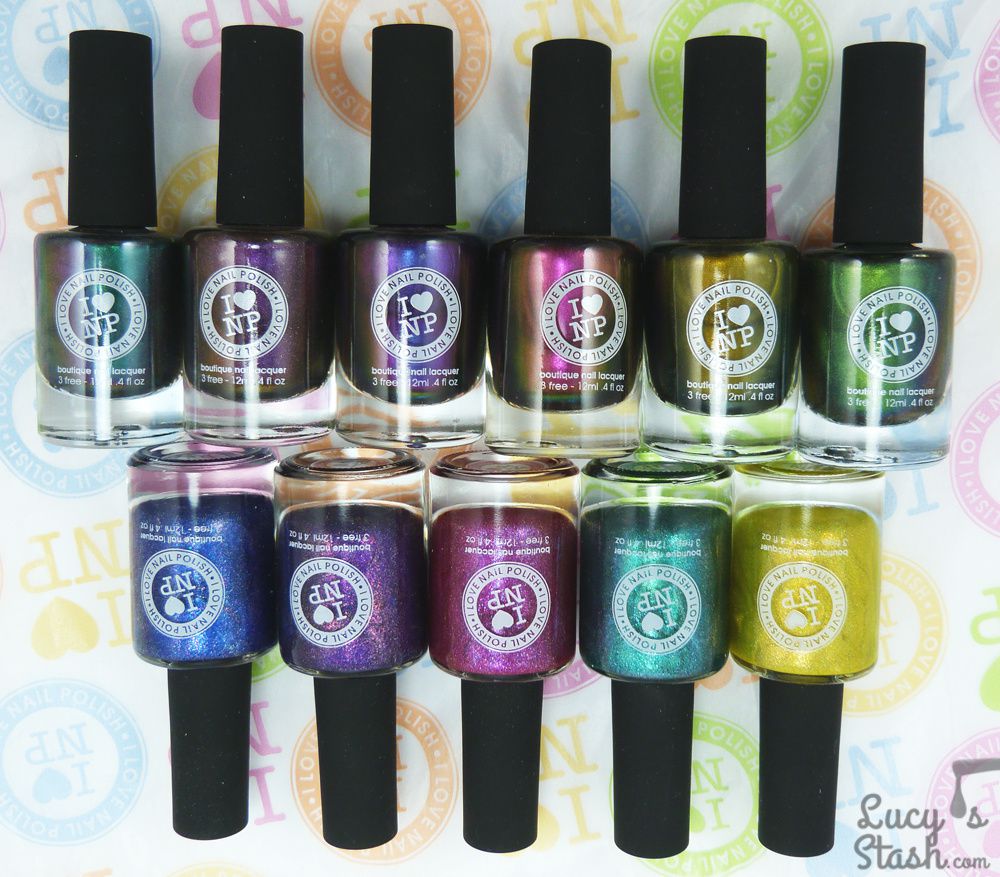
This second half of the Summer Collection 2014 consists of three multichromes and three multichromes with added holographic effect so let's check them out!
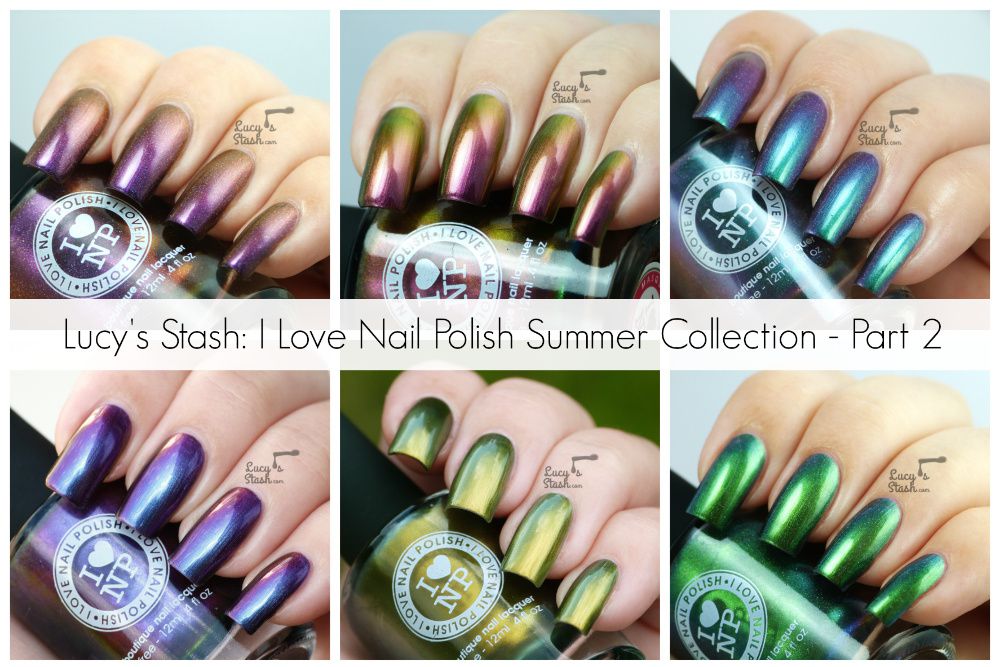
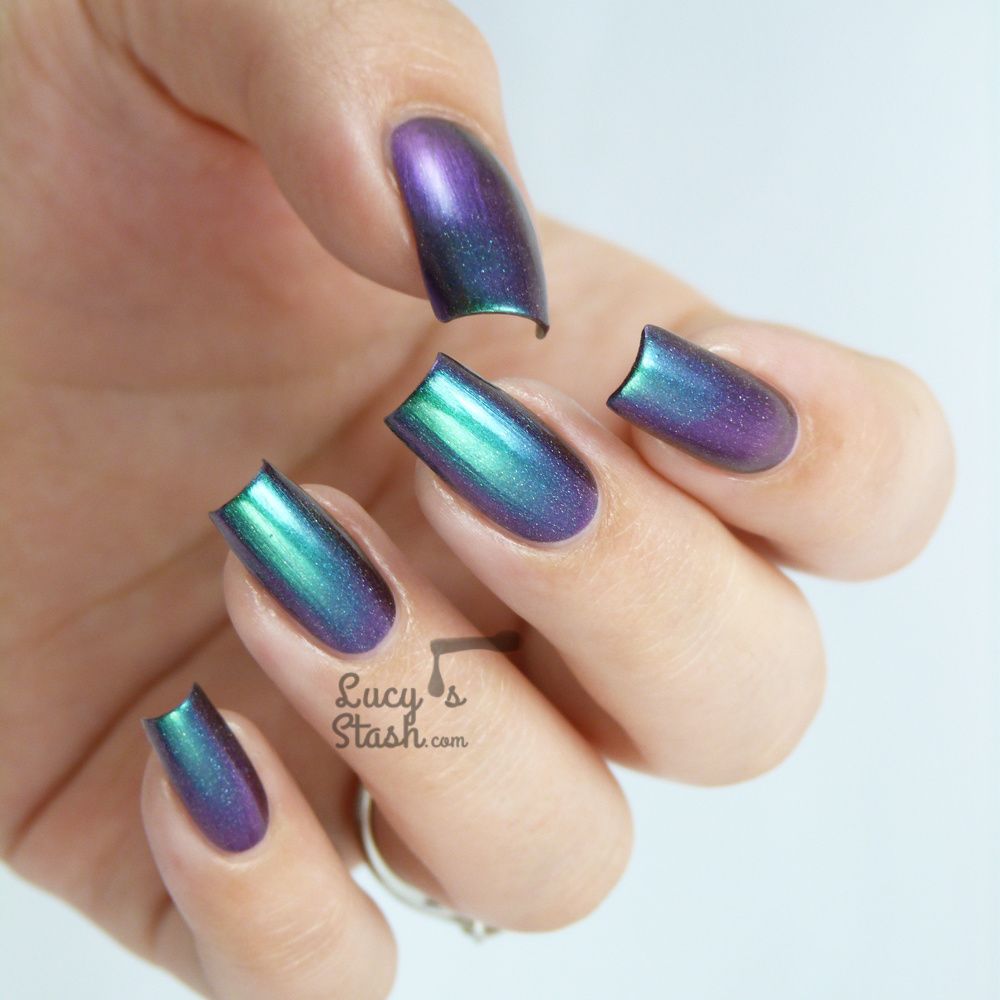
Sirène (H) - turquoise base colour with a colour shift through green, purple and blue. Admittedly, I couldn't capture all the colours as they usually show in poor light and strange angles. The polish is so beautiful and holographic effect is subtle yet it shows nicely in the sun. I've applied two thicker coats, no black base as I wanted to test the opacity. As you can see two coats are opaque. There was a minor streaking but nothing major and the polish dried fast. I've applied topcoat.


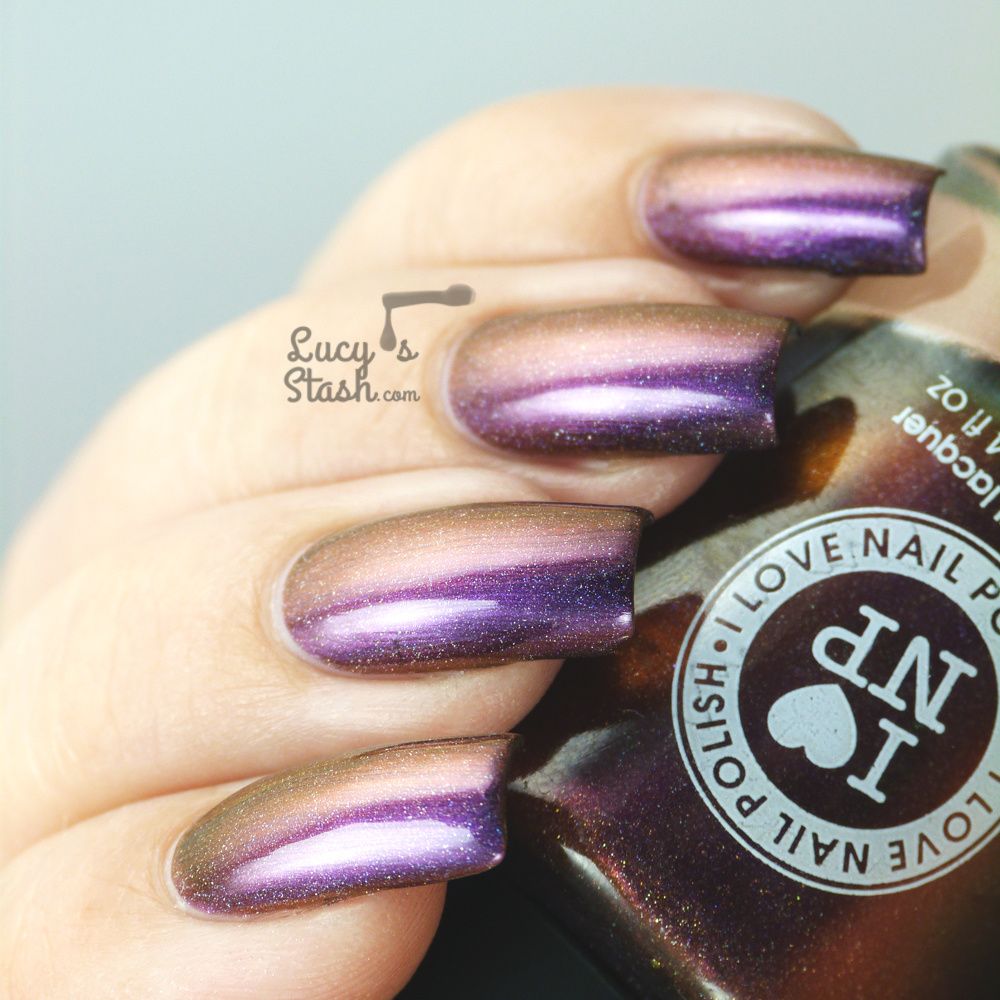
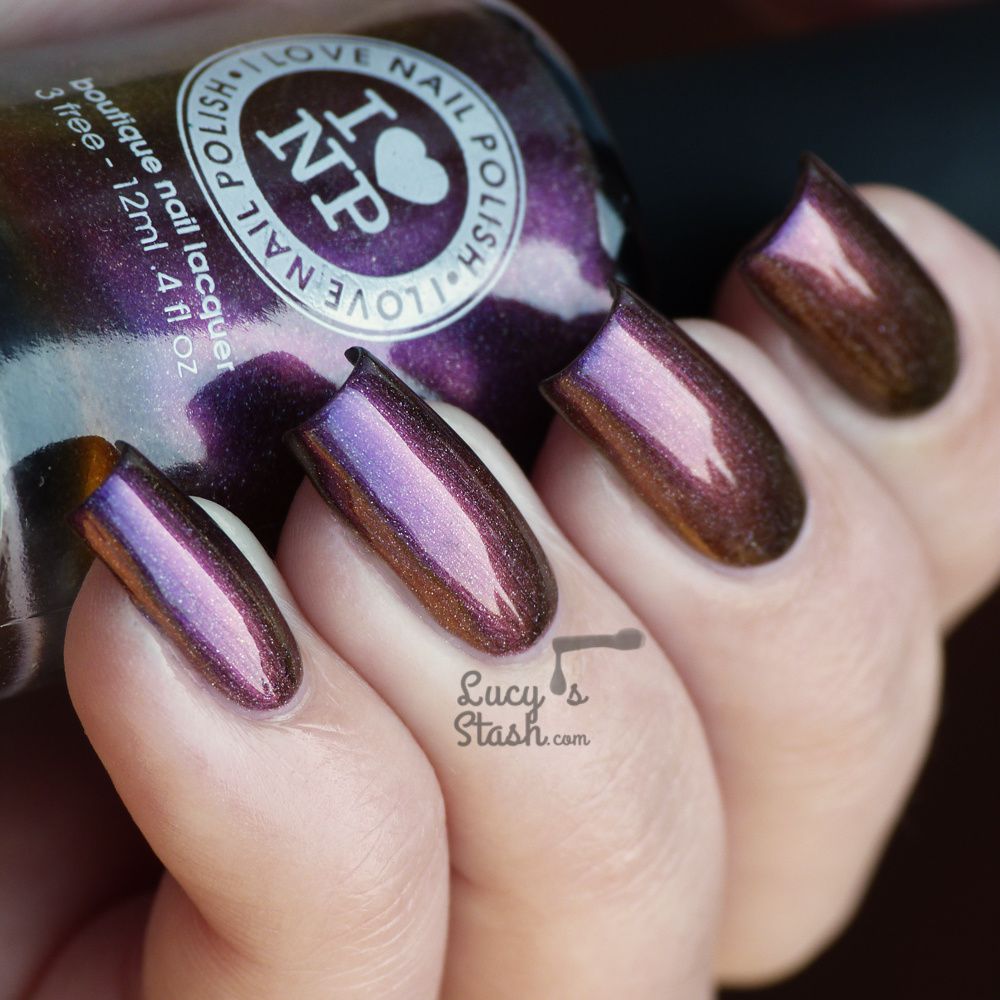
Undenied (H) - purple base with a colours shift through several shades of purple, burnt orange and olive. Another stunning multichrome that has been enriched with holographic powder! I've applied two coats and topcoat again and was happy with the opacity. It applied well and dried fast.


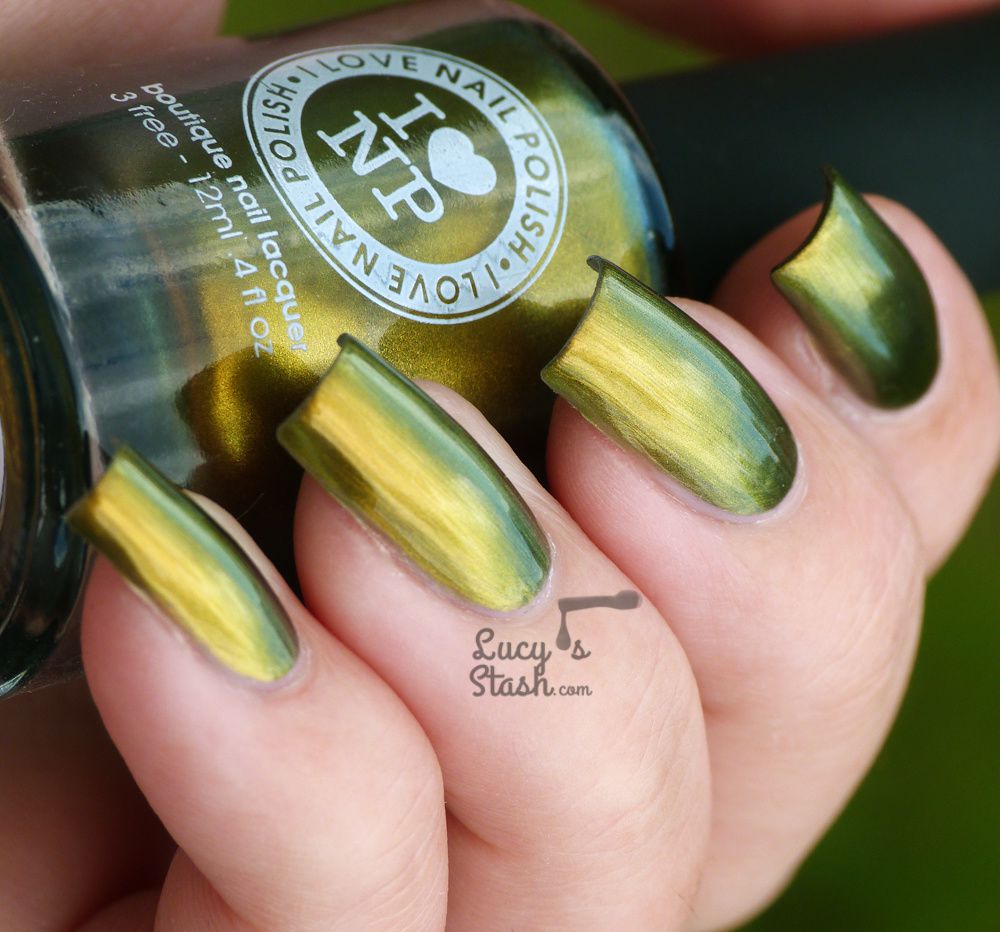
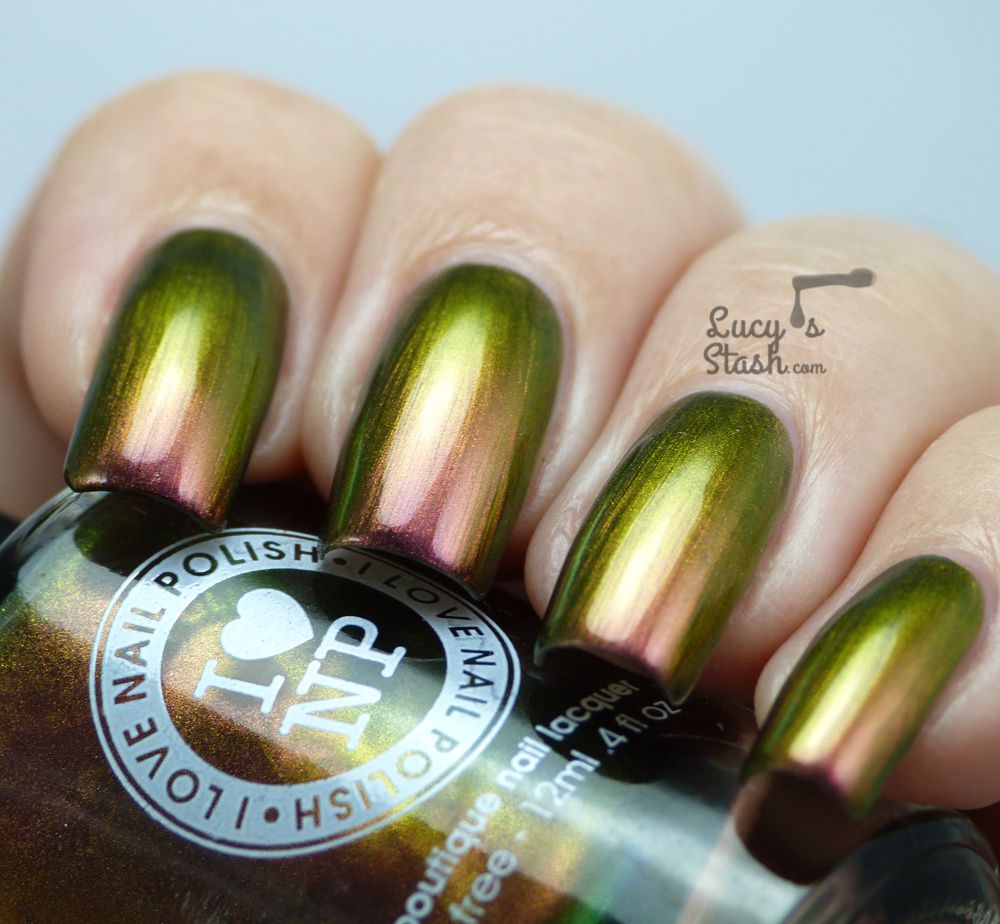
Reminisce (H) - vibrant green base with shift through darker shades of green, blue and a hint of gold. I know I keep saying 'beautiful' and 'stunning' but the trouble is, each shade is absolutely gorgeous and different. I love Reminisce for its vivid green and of course the subtle holo effect. Two coats were enough for full coverage, streaking was minor and it dried fast.


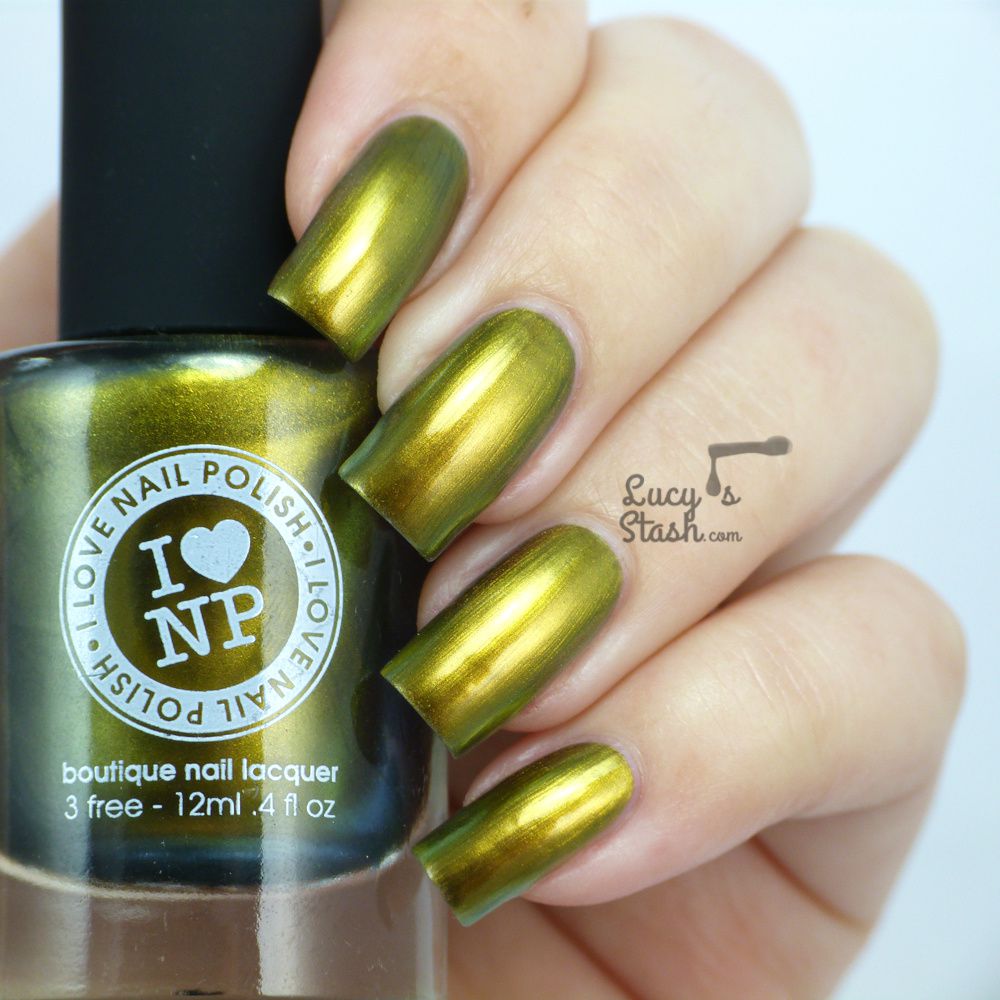
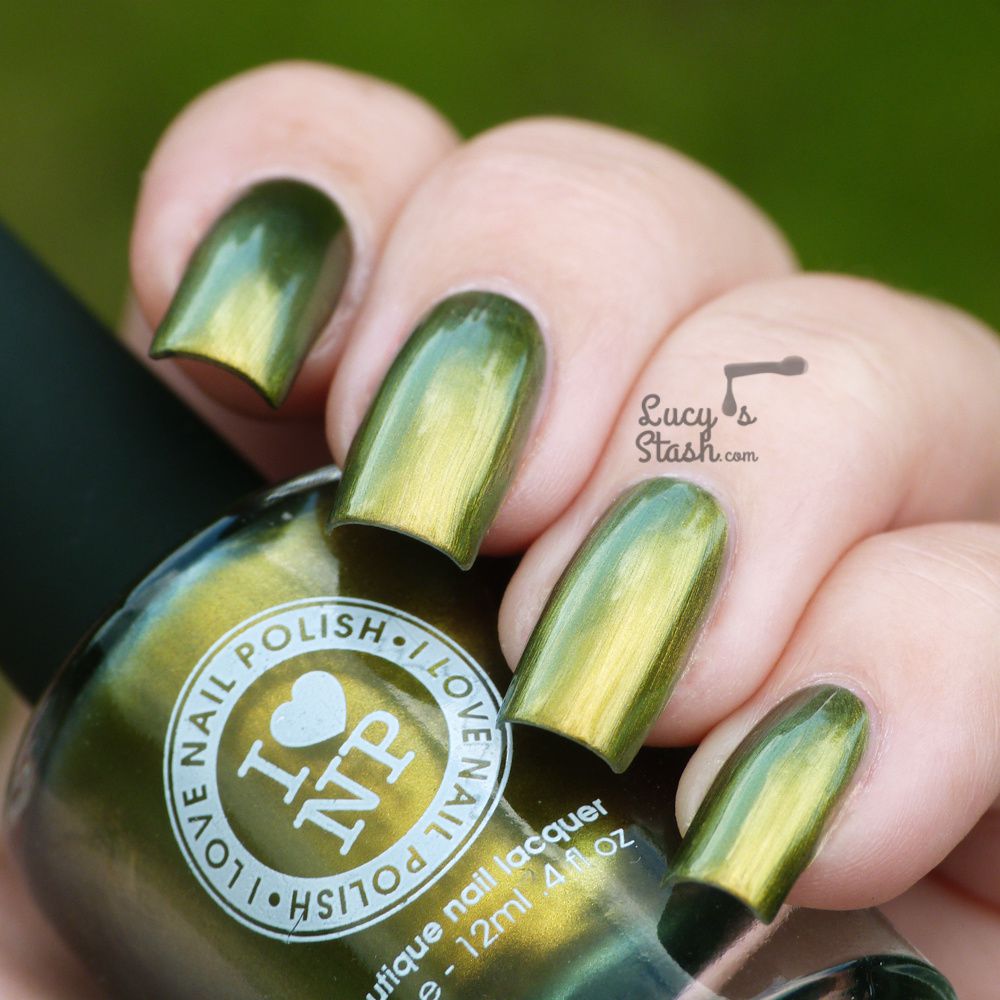
Bishop - golden green base with shift through olive and blue shades. Bishop is quite unique and unusual colour in my eyes. It looks beautiful even though I wouldn't usually reach for this kind of shade. The colour shift just makes it worth having; there is no holographic effect in this polish. I've applied two coats and topcoat, streaking was only minor and polish dried fast.

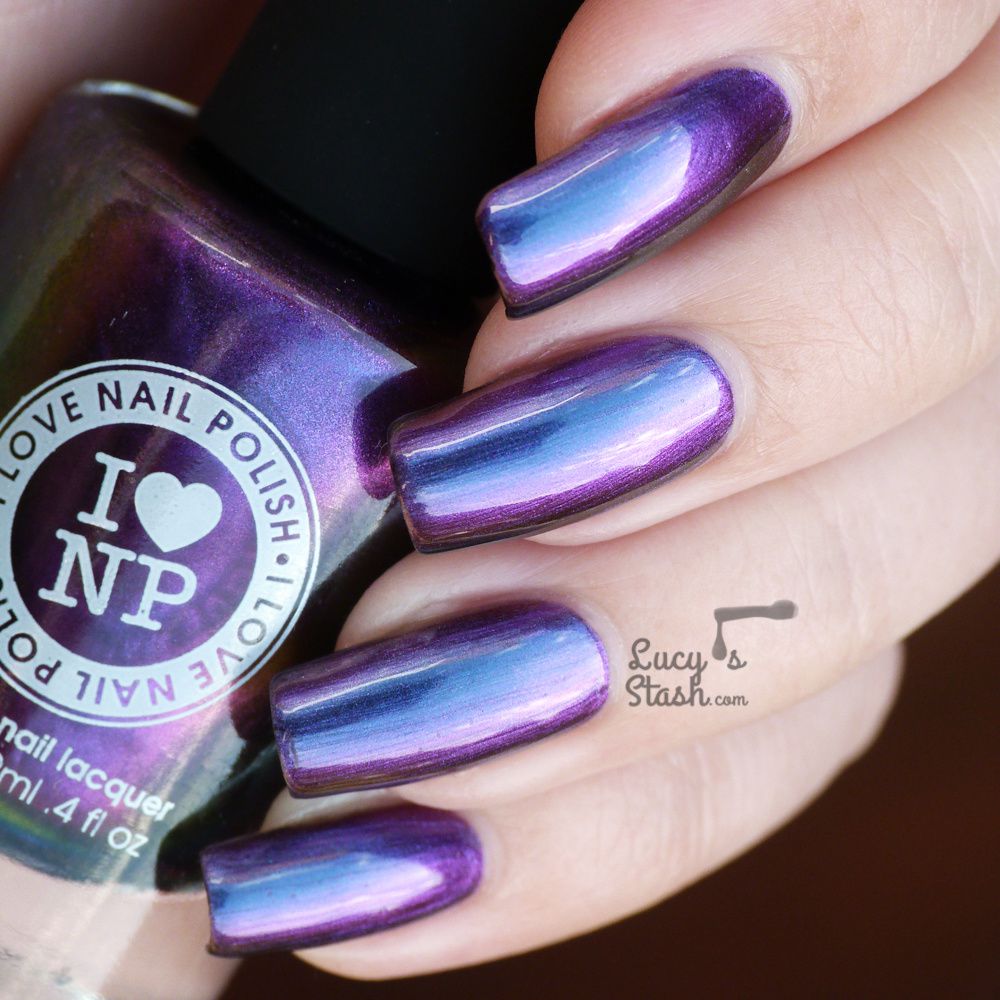
Peace - electric blue base with strong shift through shades of purple and into burnt orange. Oh so beautiful! I can't help myself, this shade is ALSO stunning! It was fully opaque in two coats with some minor streaking and dried fast.


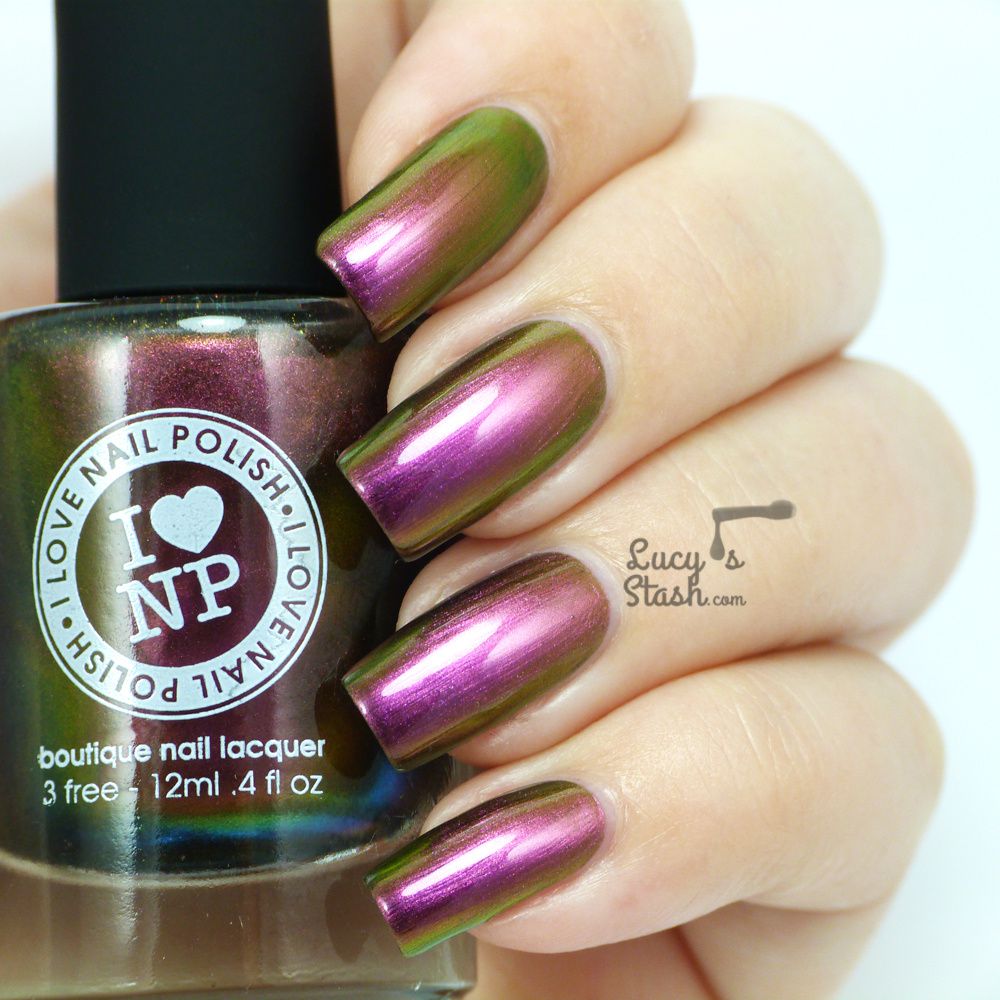
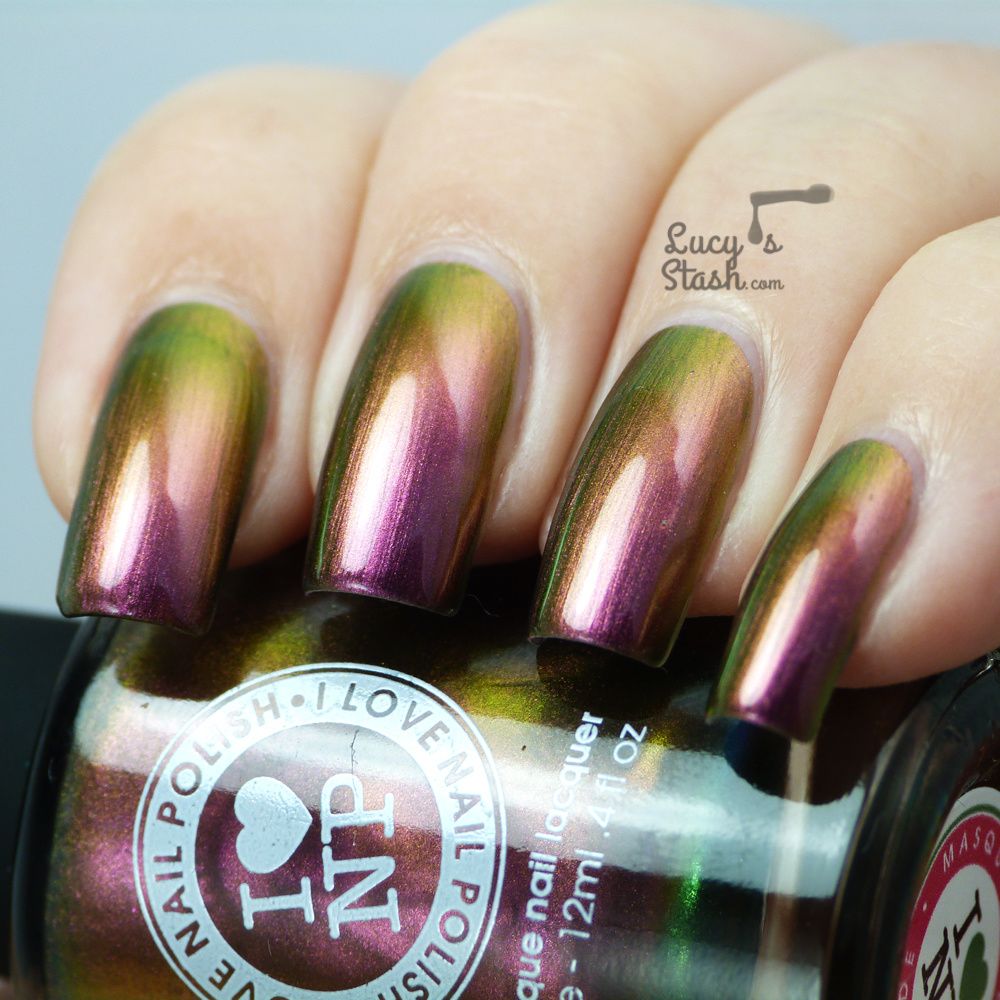
Masquerade - warm-toned purple base with shift through medium pink, olive green and vibrant green. I wore this shade as last one and I've left it on for 4 days and I can tell you all I had was minor tip wear, no chips! I've applied two coats of Masquerade, base and topcoat. Again, there was some minor streaking but it is not distracting from all the beautiful colours on your nails. It is another interesting combination and I really loved wearing it!

Oh god, I must sound like a broken record but I swear they are all so beautiful, even more beautiful in real life than in my pictures! It was so hard to pick just few photos! I haven't had a problem with application except very minor streaking and they were all opaque in two coats (mind you I always apply thicker coats). I would recommend you try to apply the over black polish for even better results. I just wanted to test how they will perform without the safety net of black base.
Thank you Barbra for sending these over, I absolutely adore all your creations and you've outdone yourself again! Guys, if you want a special treat, this is it! You can get the Summer Collection 2014 including the holographic shades directly at www.ilnp.com now!
I hope you've enjoyed the post and photos as much as I did and let me know what you think :) Lucie x
/image%2F0703241%2F20160113%2Fob_907c21_floral-stamped-ilnp-flakie-gradient-4.jpg) Flowers & Flakies Nail Art ♥
Flowers & Flakies Nail Art ♥ /image%2F0703241%2F20160103%2Fob_63e882_shattered-glass-trend.jpg) Lucy's Stash and 2015 Highlights, Favourites and Fails...
Lucy's Stash and 2015 Highlights, Favourites and Fails.../image%2F0703241%2F20150201%2Fob_c9e461_futuristic-stamped-mani-over-ilnp-metr.jpg) Futuristic Stamped Design feat. ILNP Multichrome Flakies
Futuristic Stamped Design feat. ILNP Multichrome Flakies/image%2F0703241%2F20150115%2Fob_8ae7dd_pueen-stamping-over-ilnp-brilliance.jpg) Floral Stamping Meets ILNP Flakies ♥
Floral Stamping Meets ILNP Flakies ♥

/image%2F0703241%2F20160913%2Fob_a0f8a6_british-nail-art-over-dance-legend-gre.jpg) 10 Old Nail Art Manicures That Never Made It To The...
10 Old Nail Art Manicures That Never Made It To The.../image%2F0703241%2F20140113%2Fob_d06829_cnd-lilac-longing) CND VINYLUX Lilac Longing - Review & Swatches
CND VINYLUX Lilac Longing - Review & Swatches/image%2F0703241%2F201311%2Fob_29c1f2_moustache-movember-nail-art-nails-1.jpg) Movember Moustache Nail Art
Movember Moustache Nail Art/image%2F0703241%2F201311%2Fob_00aaa3_cnd-forbidden-collection.jpg) CND VINYLUX™ Forbidden Collection - Review & swatches
CND VINYLUX™ Forbidden Collection - Review & swatches